Pod Call Record - User Guide
Guide on using and navigating the Call Recording portal
- Overview
- Recordings
- Recordings Dashboard
- Viewing and Listening to Recordings
- Download a Recording
- Find a Recording
- Adding Notes
- View Event History
- Delete a Recording
- Managing Numbers
- Agents
- Departments
- Flags
- Users and Roles
- Forgot Password
Overview
|
INFO: Your login details for access to the portal will have been emailed to you at the time the account was created. Please check your spam/junk folders. Please contact your Service Provider if you have not received them. |
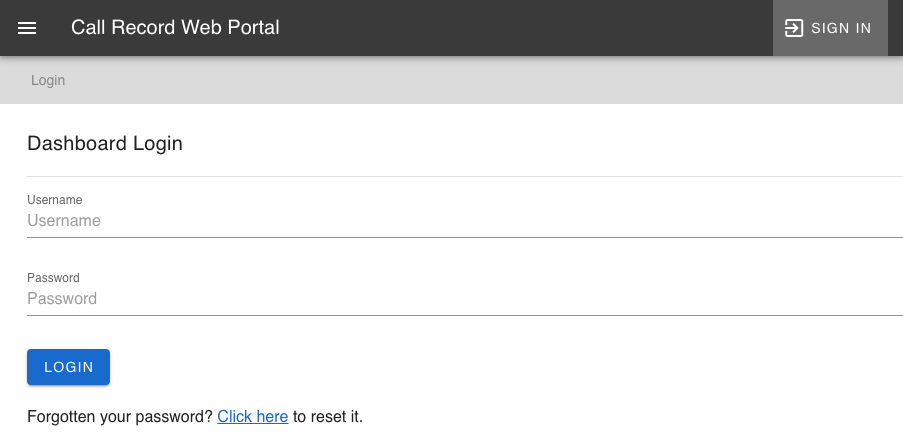
Logging In:
Open web browser to https://recordings.podunifiedcomms.com/ (Chrome/Safari/Edge) Once open you will see the login page. Enter the Username and Password supplied by your Service Provider and click on LOGIN
Once logged in you will see the main navigation menu on the left hand side.
|
INFO: Please note that the Dashboard is currently blank, this is not an error. Analytics is currently unavailable will be coming later on in a future update. The Payment and Billing section can be ignored this is due to be removed in the next update. |
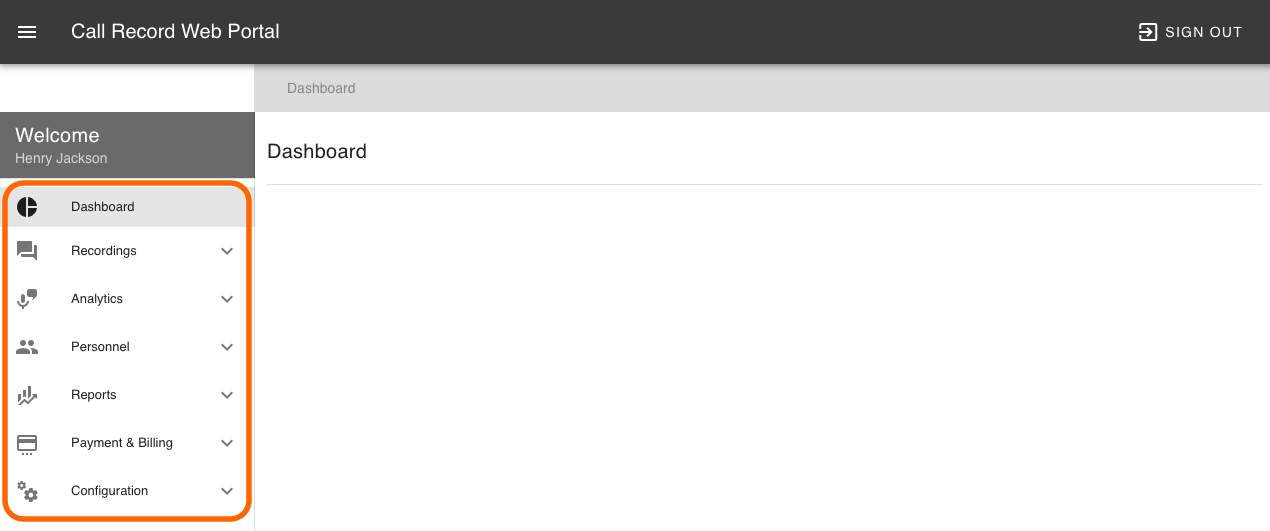
Recordings: Manage your numbers and view, edit and download your recordings.
Personal: Create users, agents, roles and departments, these can be linked to recordings.
Reports: Displays graphs on usage and recordings.
Configuration: Manage accounts settings and Company details.
Recordings
How to view and manage your recordings.
Recordings Dashboard
The Recordings Dashboard is designed to give quick access and an overview of all recordings.From the navigation menu on the left click on Recordings.
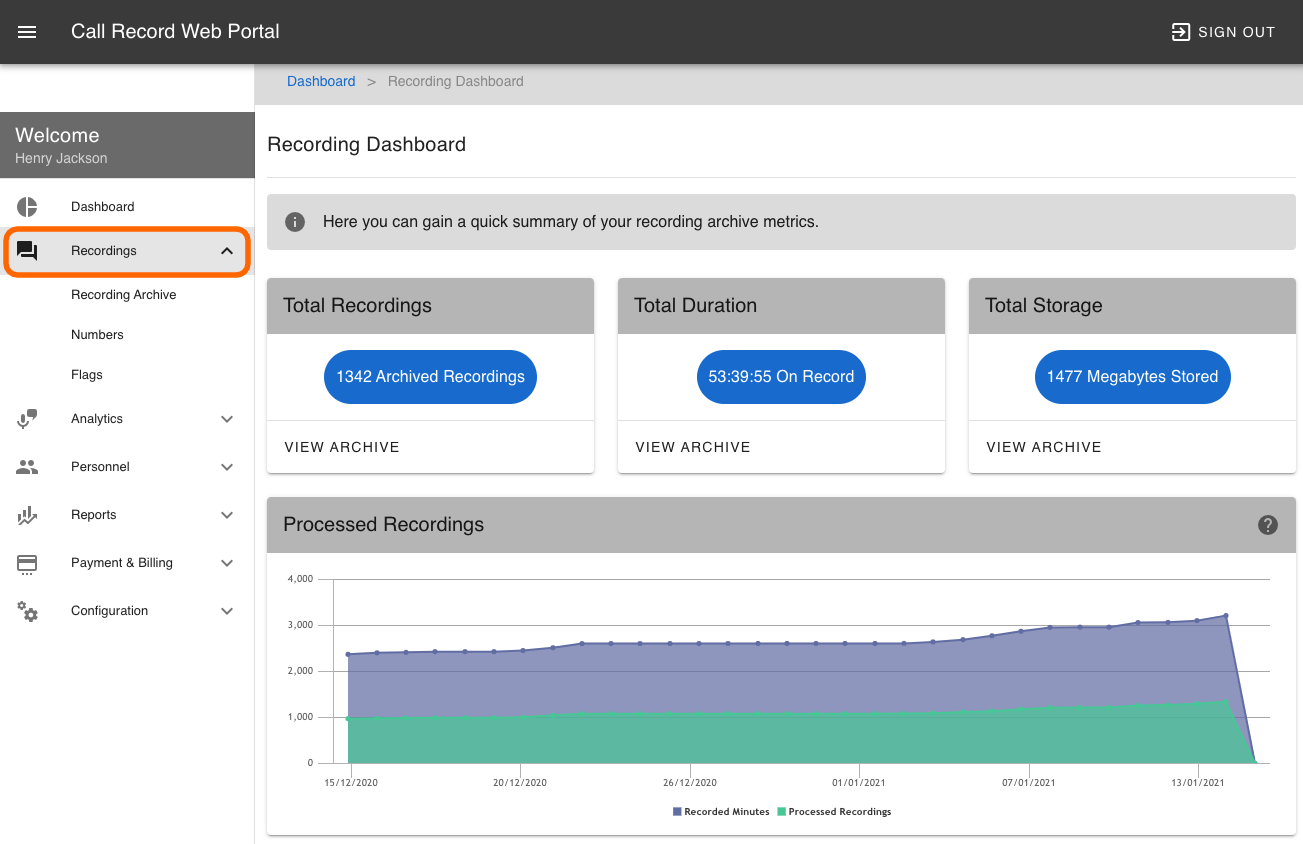
This page will give you an overview of the following:
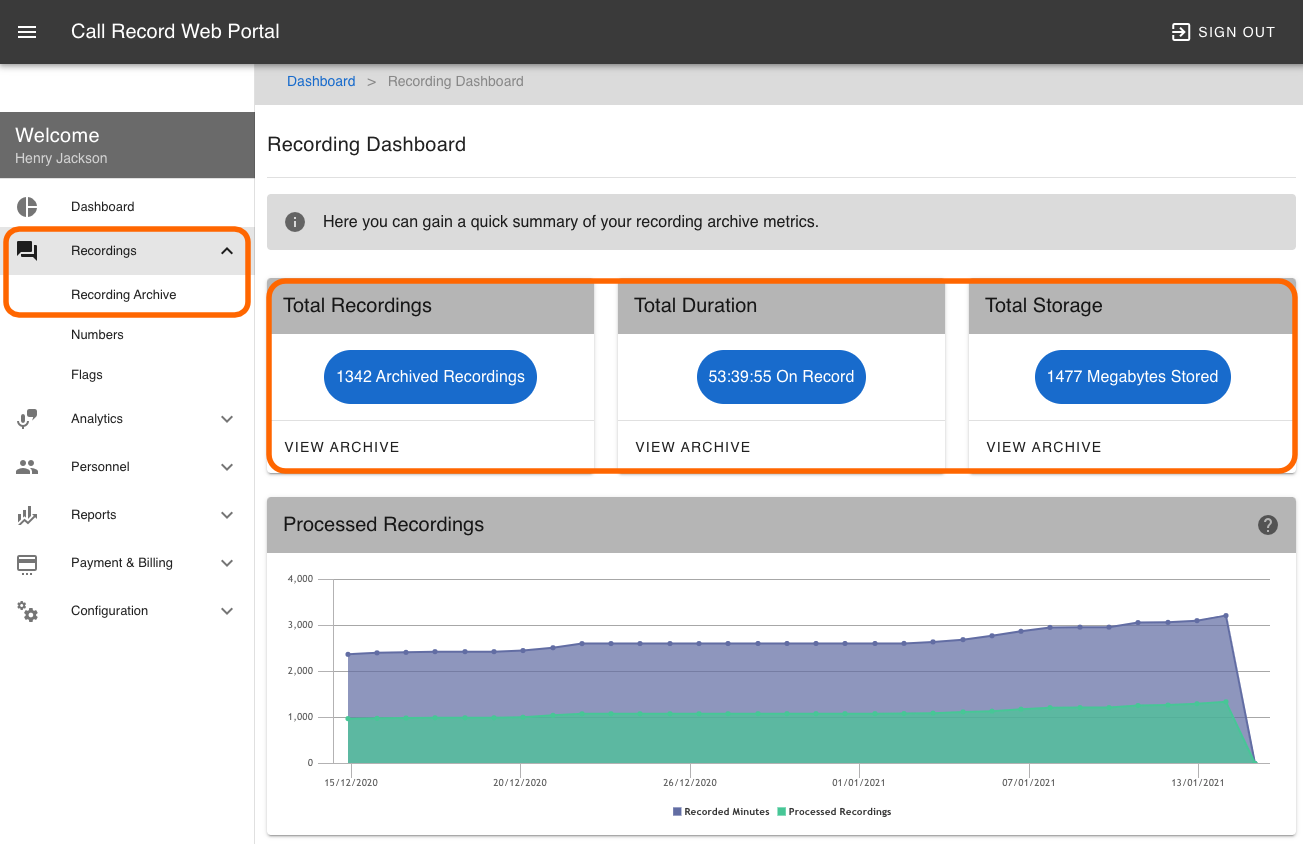
Total Recordings: Total number of recordings that have been saved.
Total Duration: The total duration of all recordings in hours:minutes:seconds
Total Storage: Total space used by your recordings in Megabytes.
|
INFO: The Pod Call Record Storage space is currently unlimited. Please contact your Service Provider for further information. |
The graph at the bottom will give you an overview of processed recordings over the last 30 days.
Viewing and Listening to Recordings
To view and listen to your recordings, from the navigation menu click on Recordings and then click on Recording Archive. Alternatively from the Recording Dashboard click on any of the View Archive links on the dashboard.
The Recording Archive page will list all stored recordings. To view a recording click on the view recording link.

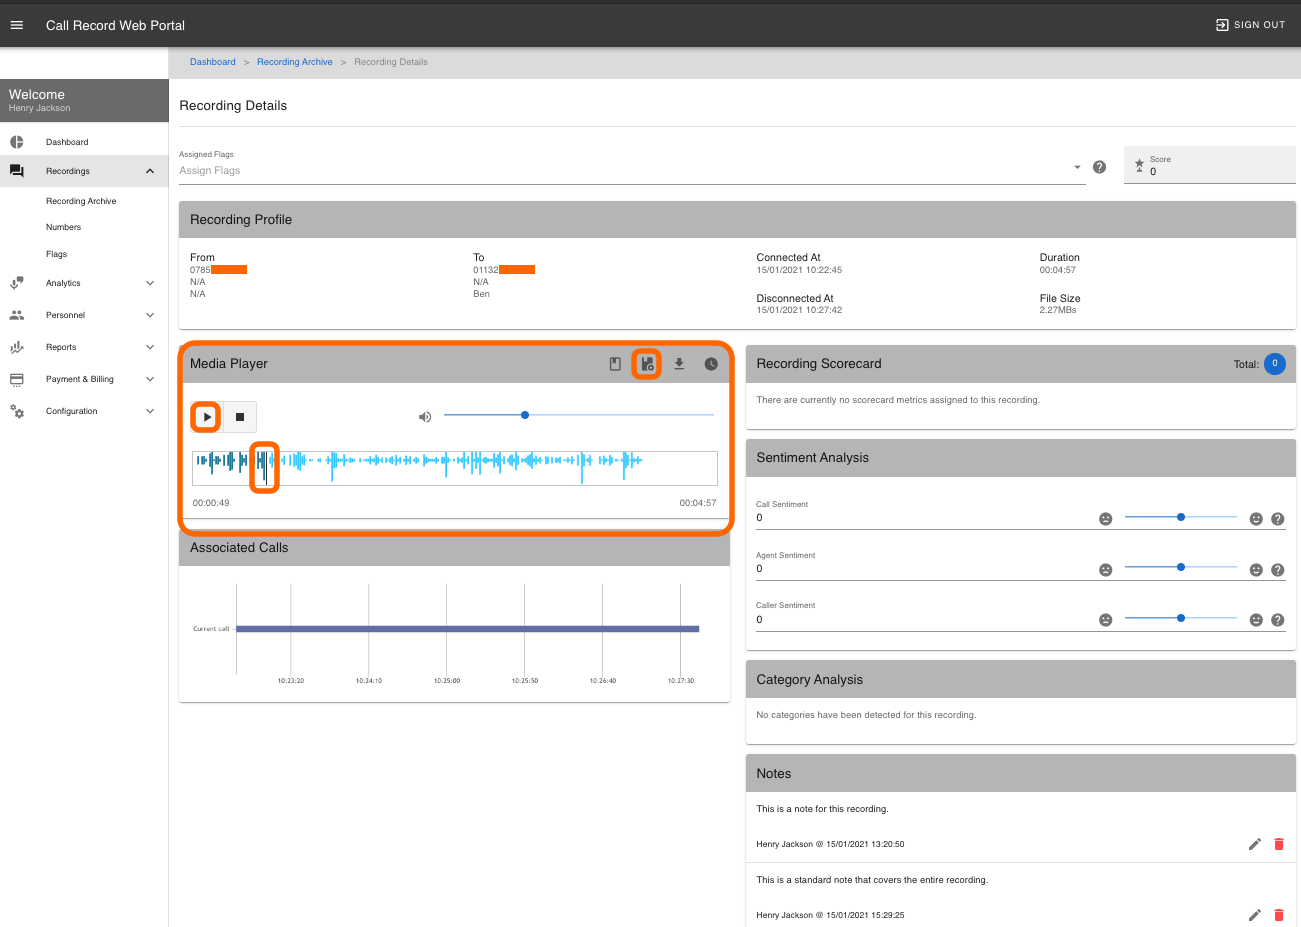
The Recording Details page, will display details about the current recording.
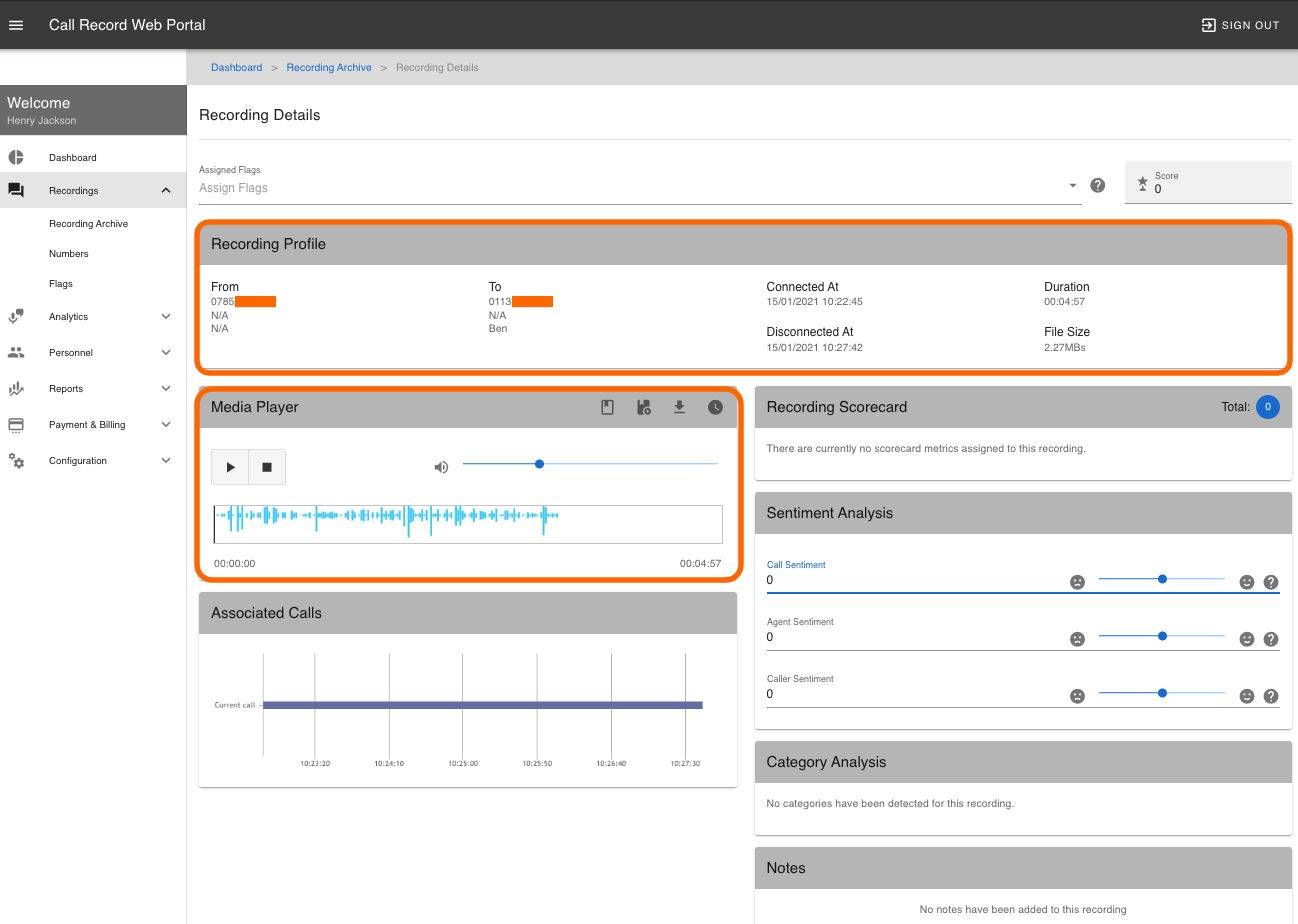
The Recording Profile shows the From and To numbers, the date and time the call Connected At and Disconnected At, Duration of the call and File Size.
The Media Player will allow you to play the recording through your web browser.
Download a Recording
To download and save a recording to your computer. From the Recording Details page click on the download icon within the Media Player.
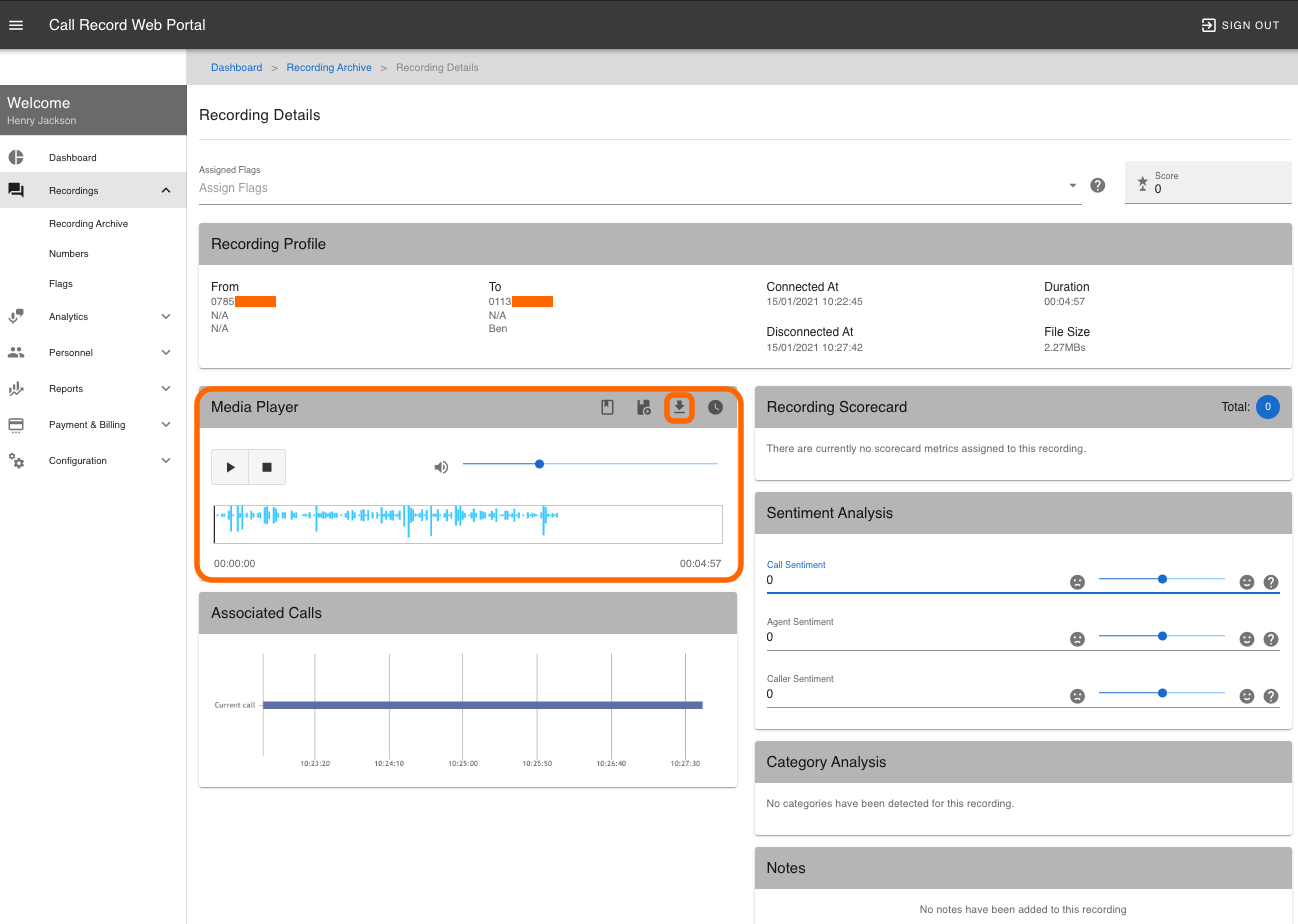
The recording will now be downloaded to your computer, depending on web browser and operating system you may be prompted to choose a location to save the file.
The recording will saved as an MP3 file and the file name will include the date, time, from and to numbers.
Find a Recording
On the Recording Archive page you also have the ability to filter the recording in order to narrow down a search. To do this click on Filters.

On the Filters window you can filter the Recording Archive page by searching any combination of the following:

- From Number: A phone number that has called in
- To Number: A phone number that you have called
- Department: If configured you can filter calls by Department
- Agent: If configured you can filter calls by Agent
- Connected After / Connectected Before: Enter date range to filter on
- Flags: If configured you can filter calls by Flags
- Score Above / Score Below: This is part of Analytics that will be available in a future update.
- Recorder: Leave blank unless using the external recorder.
In the example below we are using this to filter on calls made from Agent Ben that have been flagged as New Business Enquiry. When you have set the filters click on Search. You can Reset the filters by clicking on Reset.

If this example this has returned one call relating to the Agent Ben and Flag as New Business Enquiry.

Please remember to Reset the filters when you have finished.
Adding Notes
You can add Notes to any recording. There are two types of notes, first is a Note that covers the whole recording, the second is a Timestamp Note which can be placed at a set time within a recording.
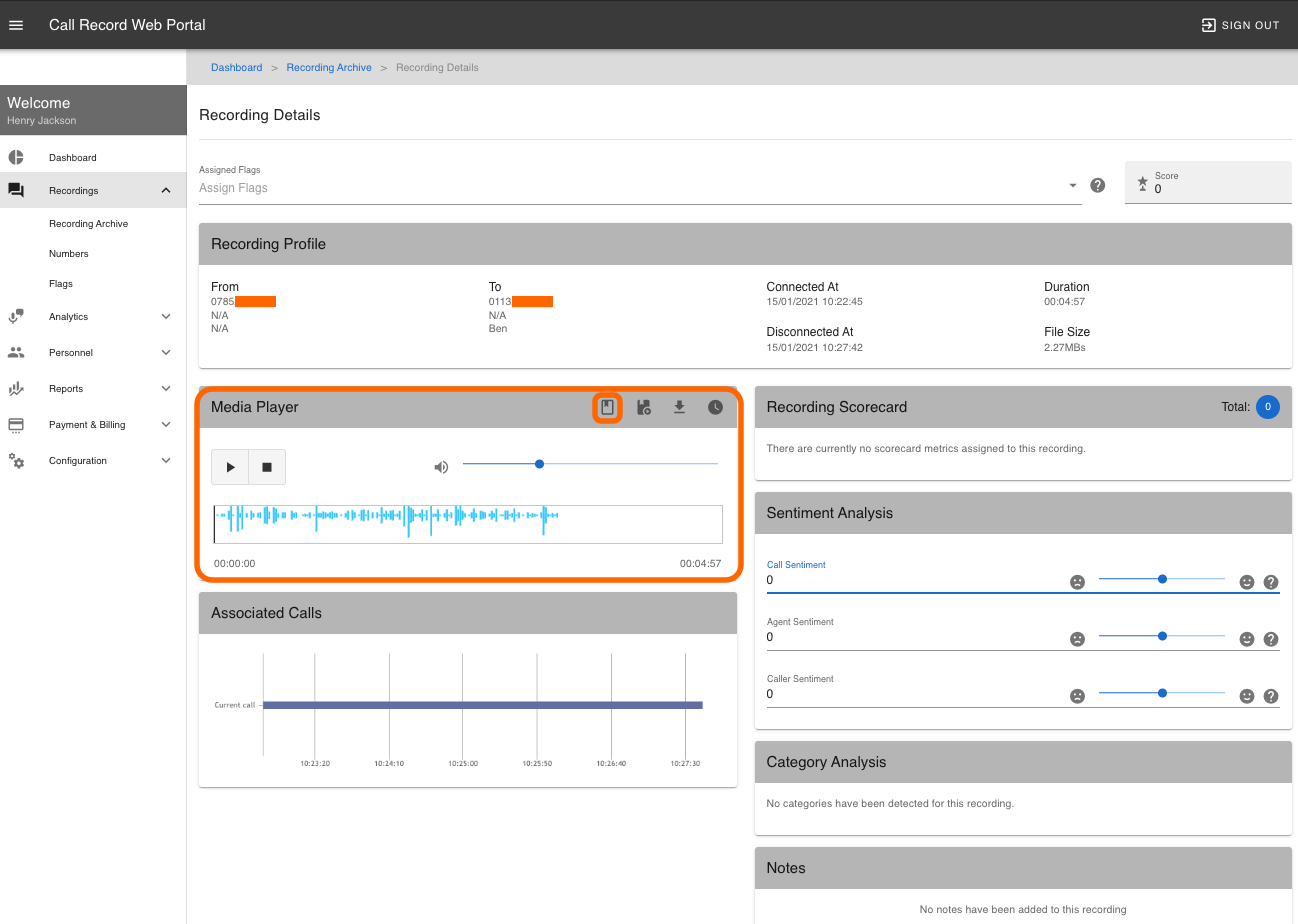
To create a Note find and view the recording, on the Recording Details page click on the Create Note icon within the Media Player.
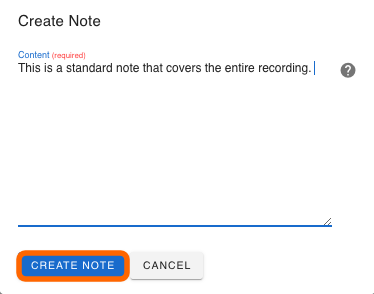
The Create Note box will appear, you can enter comments about the call. Click on Create Note.
To create a Timestamp Note, using the Media Player click on the Play/Pause button to play the recording click on the Play/Pause where you want the note to be placed this will now pause the recording. Click on the Create Timpstamp Note icon.
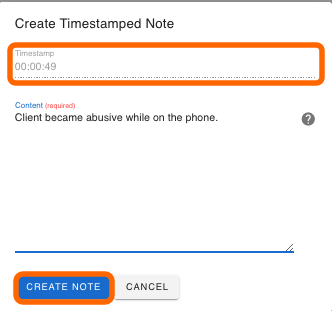
The Create Timestamp Note box will appear, this will include the timestamp of where the recording was paused. Enter your comments and click on Create Note.
You can view and edit all notes for a recording on the Recording Details, this is located to the lower right. From here you can Edit, Delete the note.
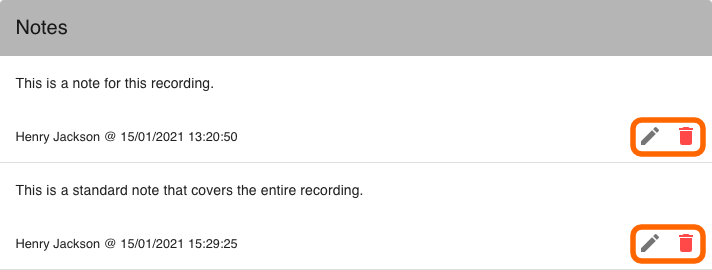
With a Timestamp Note you also have the option to Play the recording from the point where the Timestamp Note was created.

View Event History
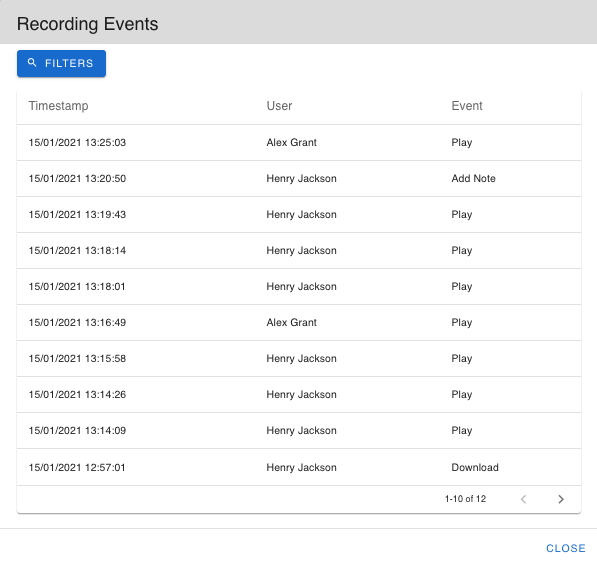
The View Event History will show all the event relating to a recording. Go into view a recording and click on the View Event History within the Media Player.
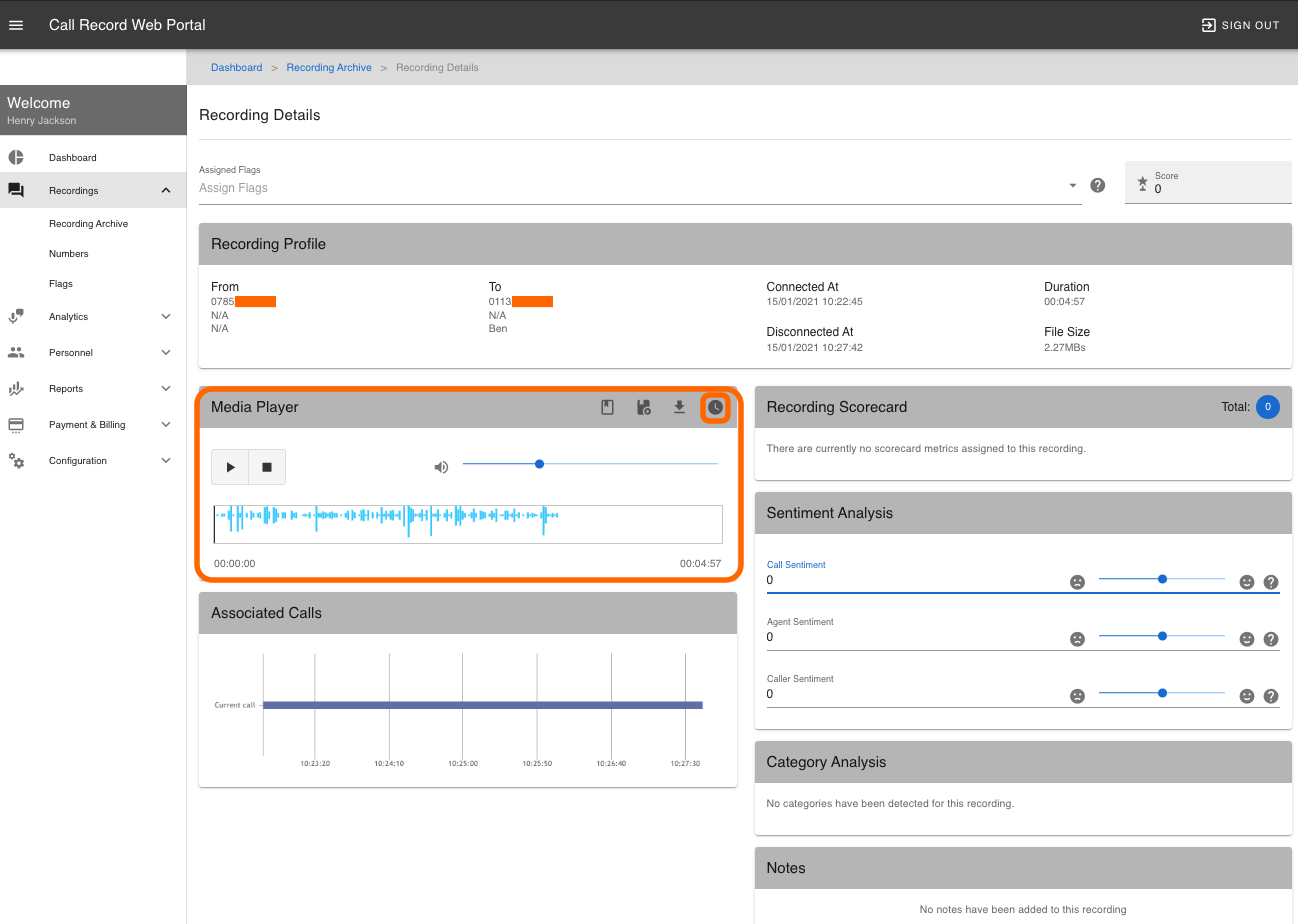
A new popup window will appear listing the Timestamp, User and the Event.
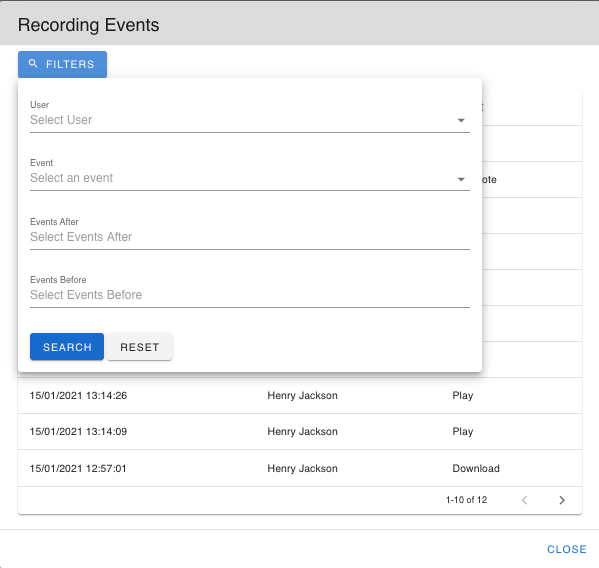
You can use the Filters to search on events by User, Event and/or before/after a certain date.
Delete a Recording
|
INFO: PLEASE NOTE ONCE A RECORDING HAS BEEN DELETED IT CAN NOT BE RETRIEVED. |
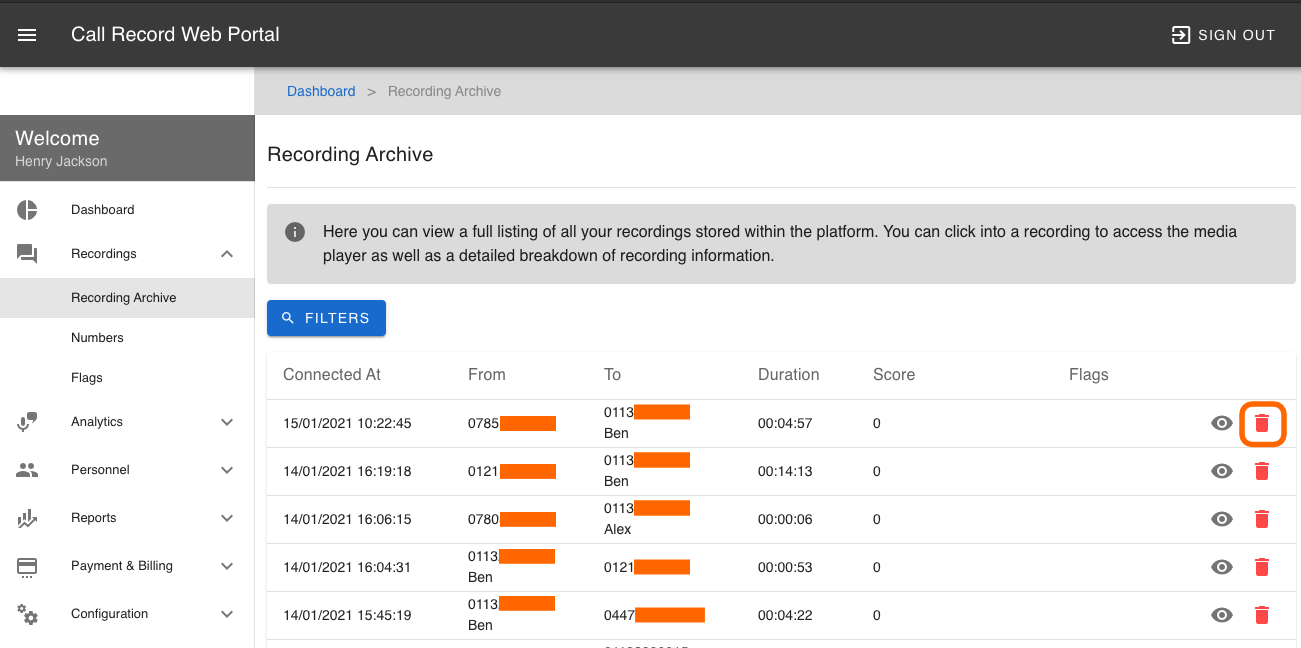
From the Recording Archive page click on the Delete Recording icon.
You will now prompted to confirm that this is the recording that you wish to delete. Click on CONFIRM DELETE
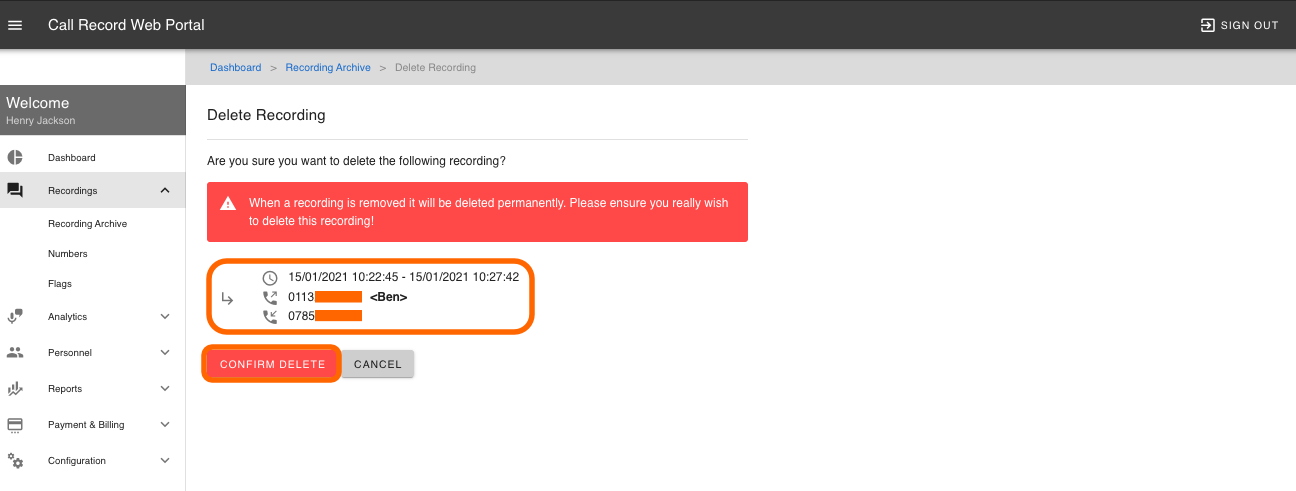
The recording has now been deleted.
Managing Numbers
You can view and manage any of you numbers that have Call Recording enabled. Click on Recordings then click on Numbers, this will display your numbers:
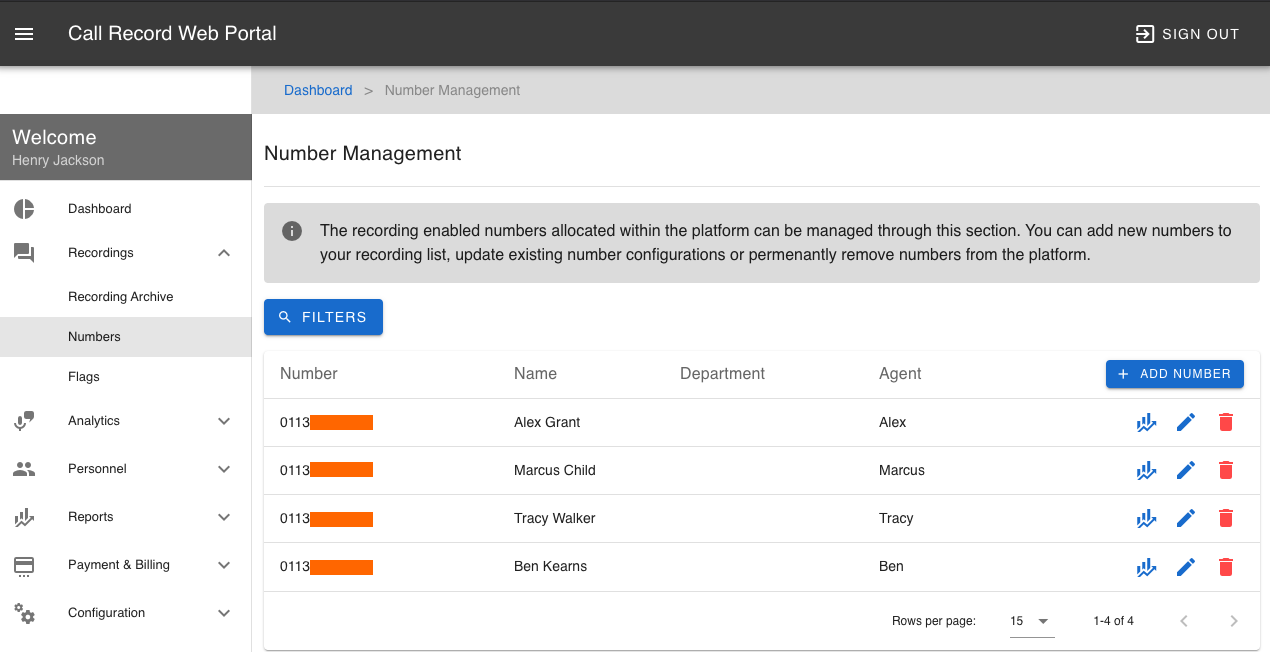
From here you view Number Statistics, Edit or Delete.
|
INFO: Please note that Deleting a number will not cancel any billing, please contact your Service Provider if you wish to cancel Call Recording on a specific number. |
Number Statistics: You view Statistics on a number by clicking on the View Statistics icon, this will details about the number. You can also use the Filter to refine a search over a period of time.

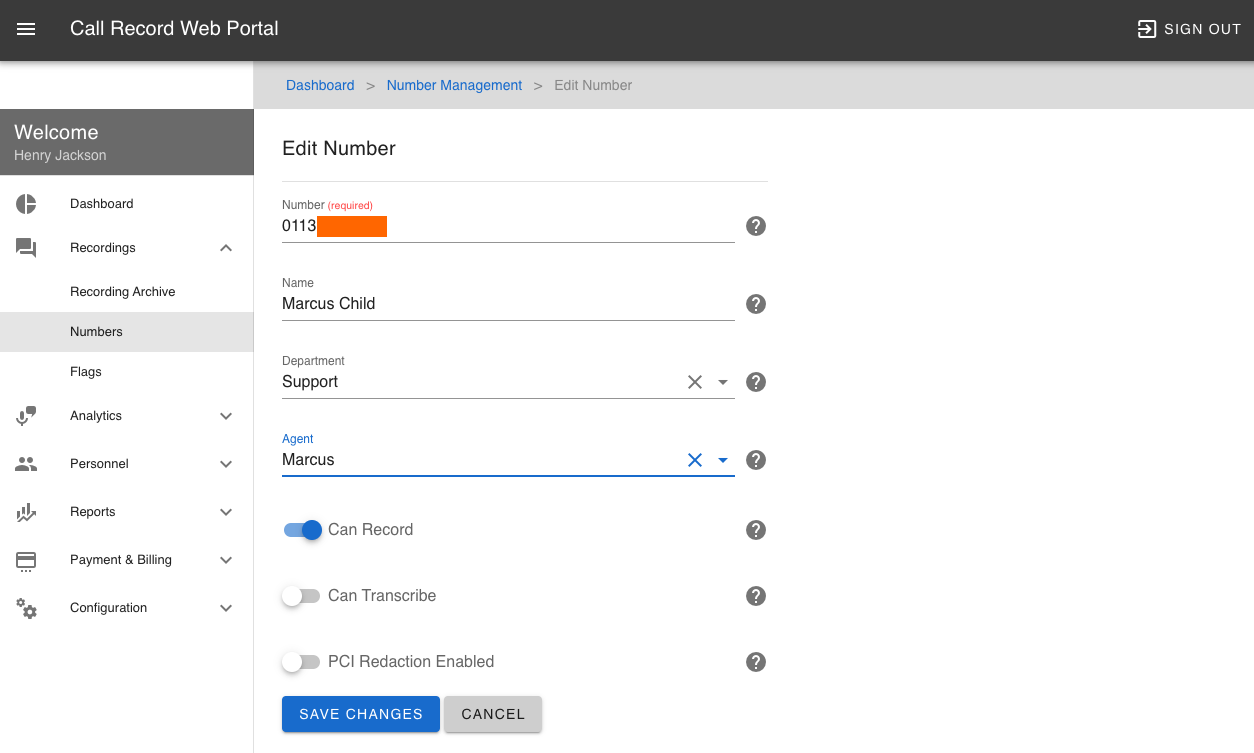
Editing a Number: You can make changes to a number by clicking on the Edit Number icon. You can assign a Name to a number, this will only be displayed on the Numbers page. If Departments are configured you can select which department that number is under. If you configure Agents you can assign an Agent to a number this Agent name will be displayed on the Recording Archive for any recording that the number has made.
You can temporarily disable recording on a specific number by turning off Can Record
Once you have finished making changes click on Save Changes
|
INFO: Please note Transcribe and PCI Redaction will be available at a later date. Please contact your Service Provider for further information. |
Agents
You can assign an Agent (A person's name) to one or more numbers. To do this click on Personal then click on Agents. Next click on Add Agent
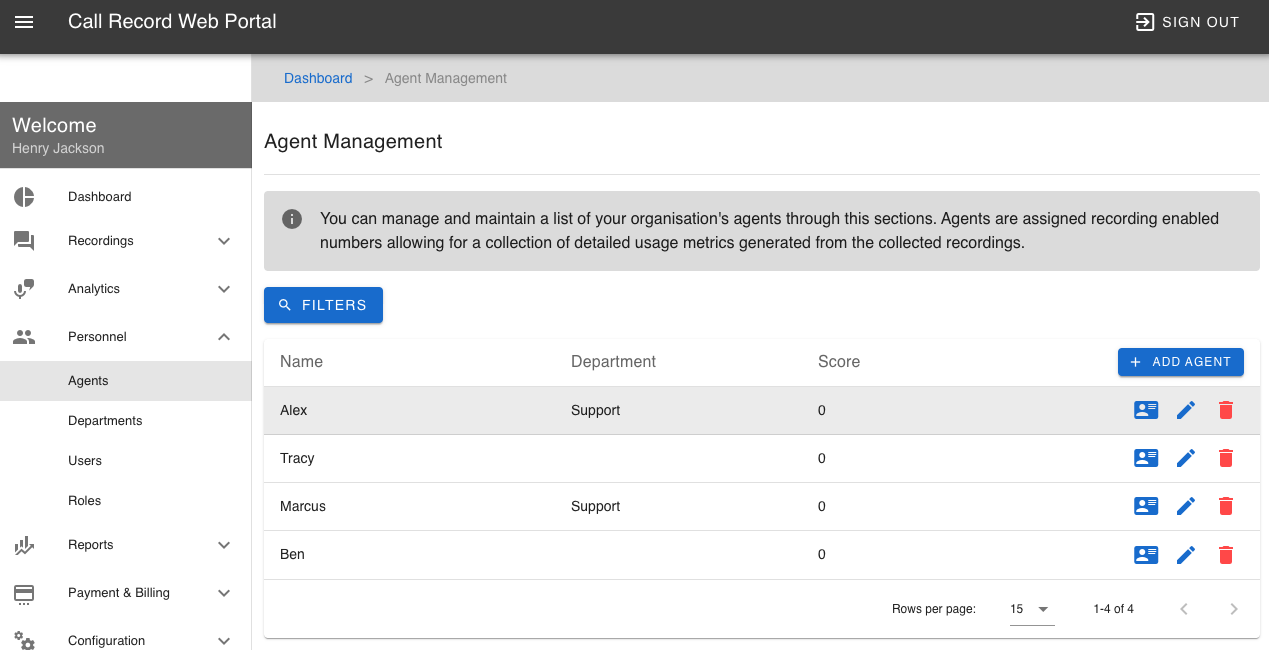
Using Agents will display the name on the Recording Archive page when a recording has been made with that Agent. You can also use the Agents to filter on. These will also be used for the Analytics and Scorecards once they become available in a future update.
On the Create Agent page add a Name for the agent, if you have departments configured select a department. Next select the Number(s) you would like to assign to this agent.
It is recommend to leave the Reviewer as blank, unless you are wanting to restrict access to the recordings. Selecting a reviewer (another user) will limit that user only to be able to see recording made by the Agent you have currently created.
Click on Create Agent when finished

You can Delete an Agent by clicking on the Delete icon on the Agent Management page. Deleting an Agent will not delete any recordings.
Departments
|
TIP: It is recommended to create your Agents and assign them to numbers before creating Departments |
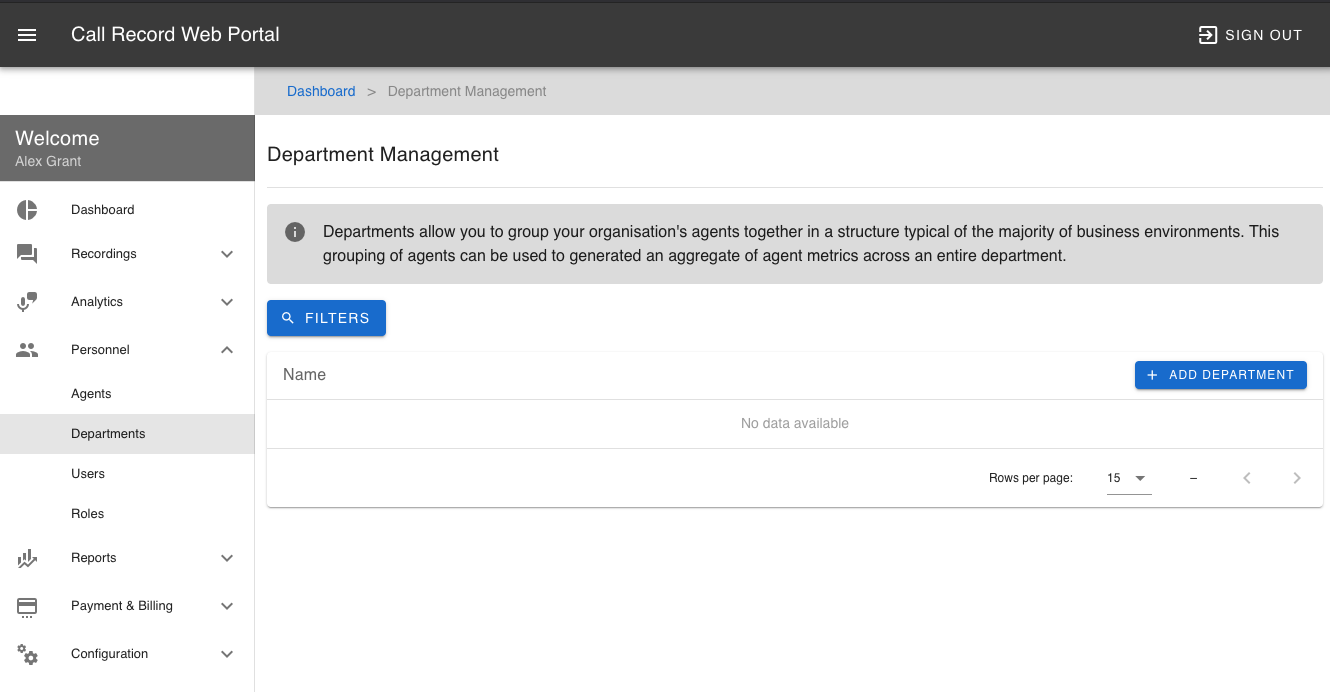
You can create Departments to use alongside Agents, to create a Department click on Personal and then click on Departments.
Using Departments will allow you to filter recordings on the Recording Archive page when a recording has been made with a number/agent assigned to that Department. These will also be used for the Analytics and Scorecards once they become available in a future update.
Click on Add Department, add a Name for this Department then select which Agents from the list you would like to assign.
Next click on Create Department. Your created Department will now show on the Department Management page.
Flags
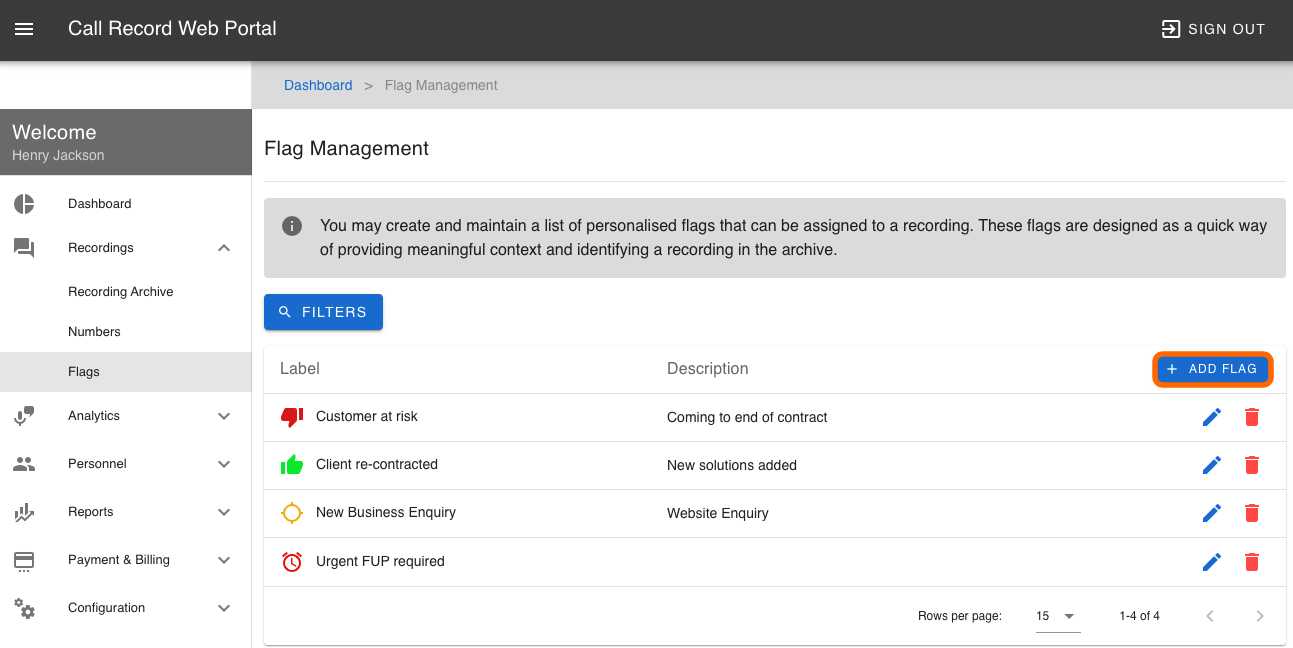
You may create and maintain a list of personalised flags that can be assigned to a recording. These flags are designed as a quick way of providing meaningful context and identifying a recording in the archive.
Creating Flags
To create a Flag click on Recordings and then click on Flags this will bring up the Flag Management page.
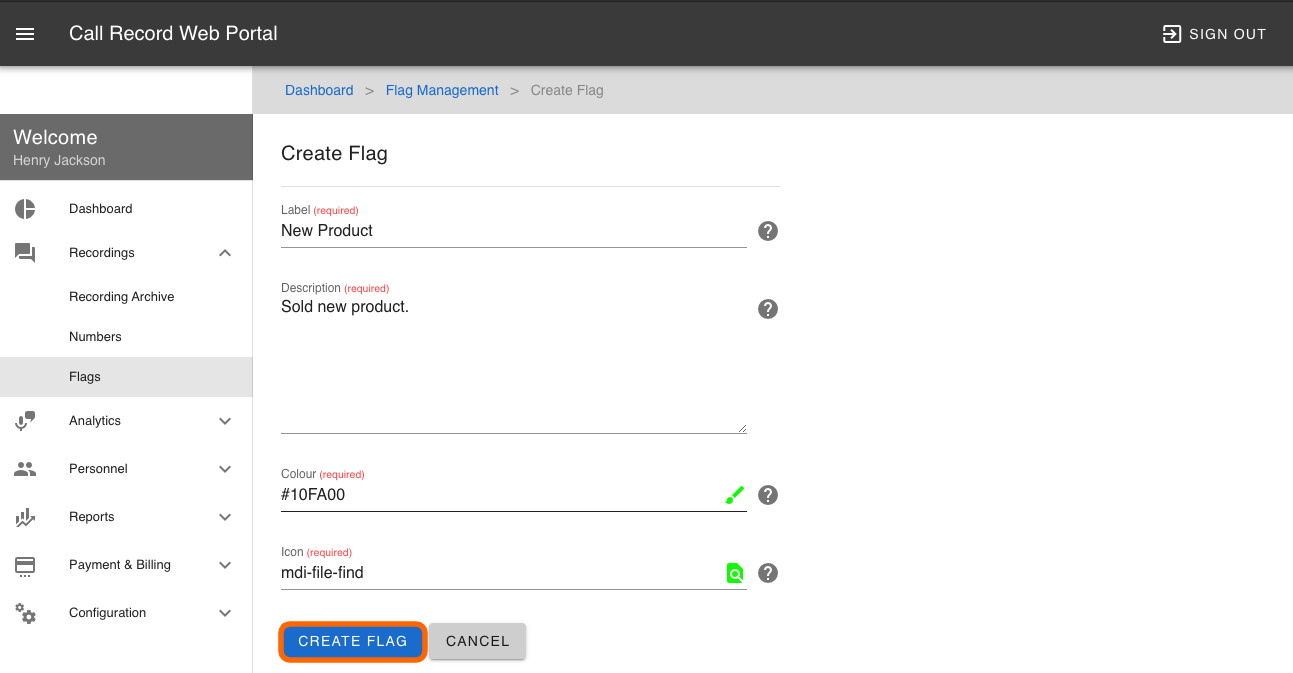
Click on Add Flag on the Create Flag page enter a Label for the flag, a Description, select Color for the icon and then select the Icon you would like to use. Click on Create Flag when ready.
Your newly created Flag will appear on the Flag Management page. You edit or delete the flags at any time by clicking on the Edit and Delete icons.

Assigning Flags
Now that you have created a Flag you can assign this to a recording. Click on Recordings then click on Recording Archive, find the recording that you would like the flag created above to be assigned to and click on View Recording.
On the Recording Details page for that recording click on the Assigned Flags to select the Flag that you created above.
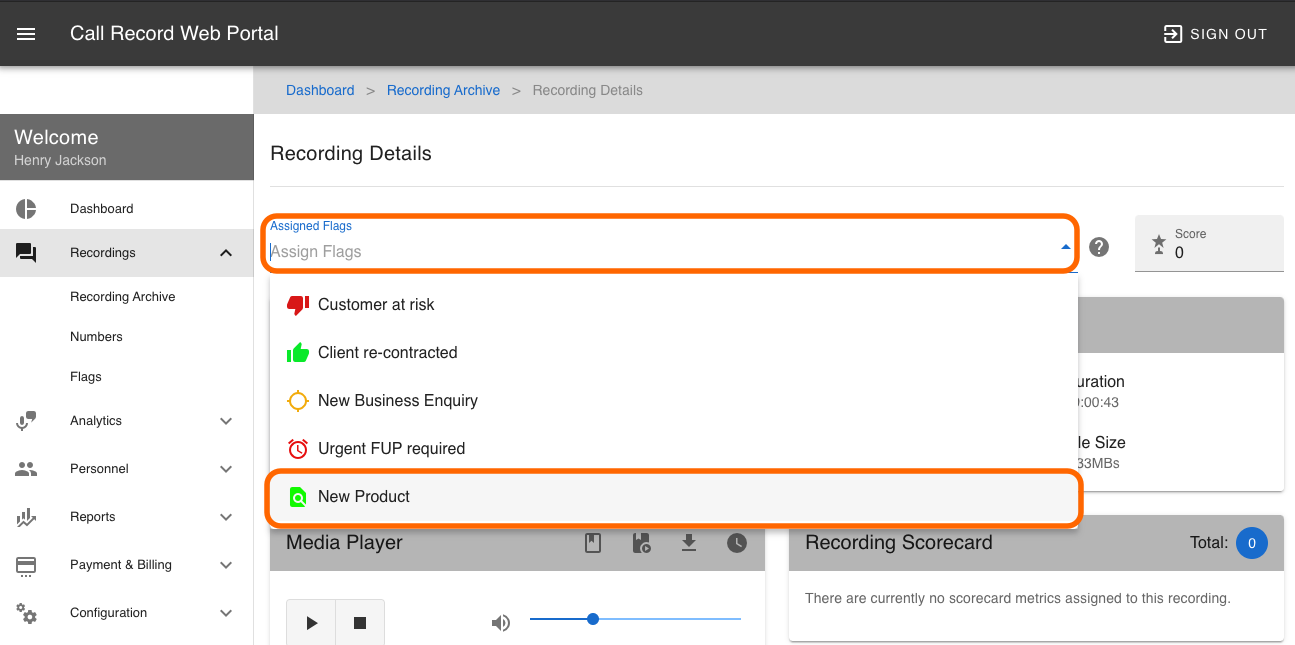
Your recording now has an assigned flag. You can also assign multiple flags to recordings. Any recordings that have assigned flags will be shown on the Recording Details page.

You can now use the Filters on the Recording Archive page to search for a flagged recording.
Users and Roles
| INFO: Before creating any additional users you must first create a Role. This Role will be assigned to the user that you create. |
To create a Role click on Personal and then click on Roles in this example we are going to create an additional Administrator with all permissions.
On the Create Role page enter a Label and Description for the role. Next select which permissions are required, in this example we are creating another Administrator so we would select all permissions. Now click Create Role.
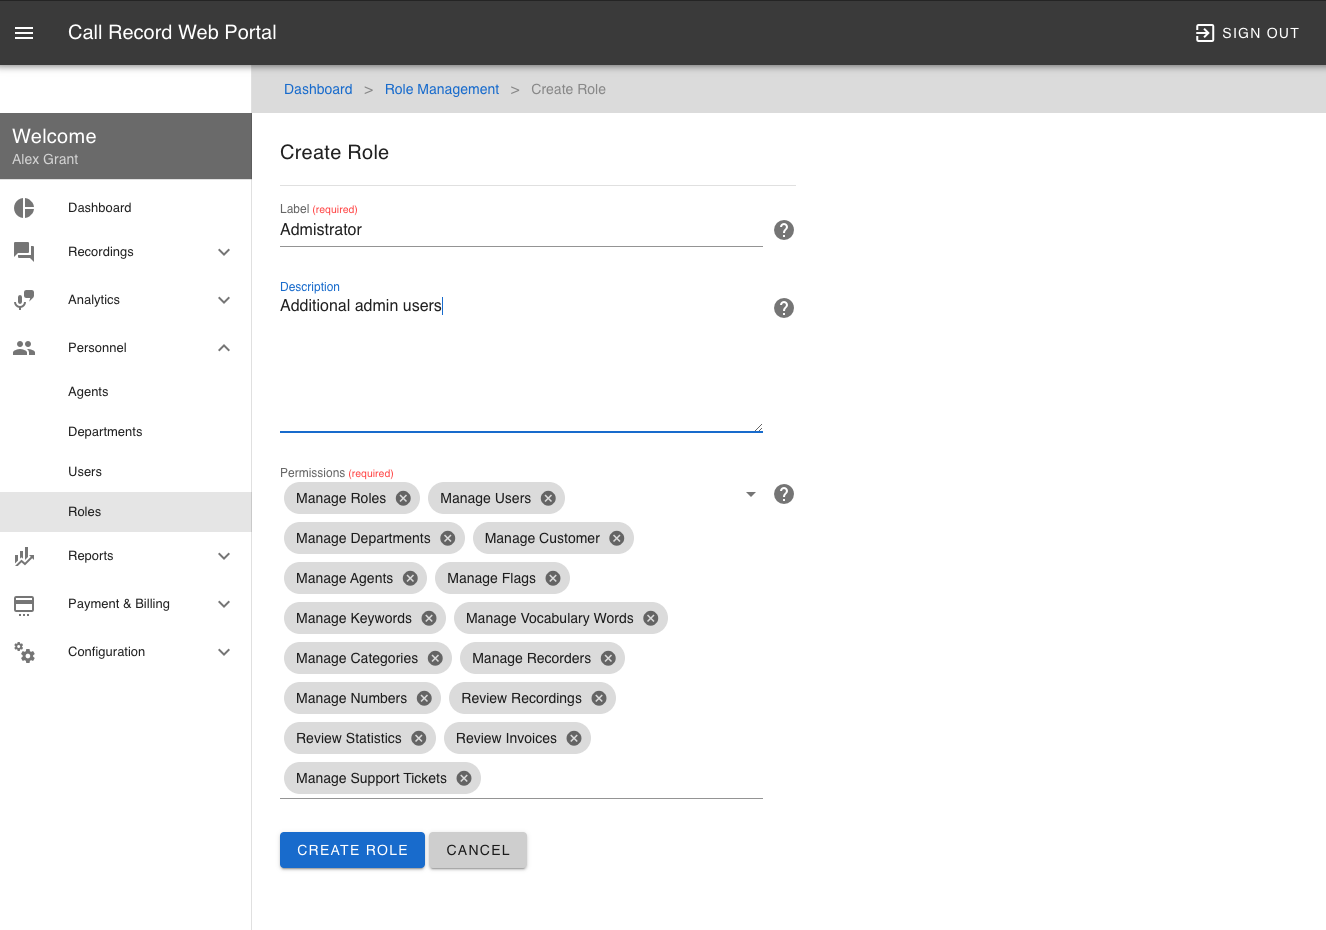
You have now created a Role for an Administrator with all permissions.
Next we need to create a User to assign this role to. Click on Personal then click on Users. On the User Management page you will see a list of current users. The primary Administrator is highlighted with a star and should not be deleted.
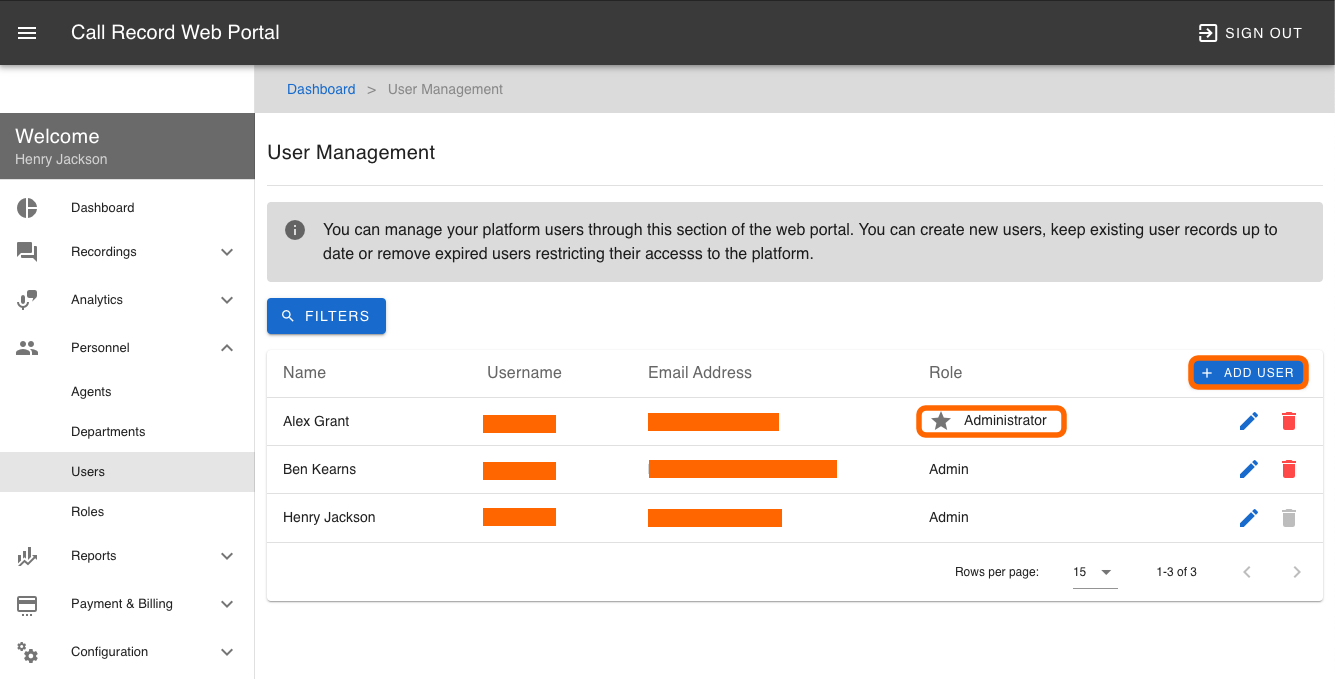
Click on Add User to create a new user, on the Create User page enter the users Name, Email Address, Username and select the Role that you have created.
| INFO: Please ensure that the email address is valid. The password will automatically be emailed once the user has been created. Make sure that you check your spam/junk folders. If you have not received the email you can use the Forgot Password link on the login page to request a new one. |
Forgot Password
|
INFO: If you do not know the email address or the Username that was used for the account please contact your Service Provider. |
Forgot Password
From the Login page click on the forgot your password link

Enter your email address for the account, and click on Submit
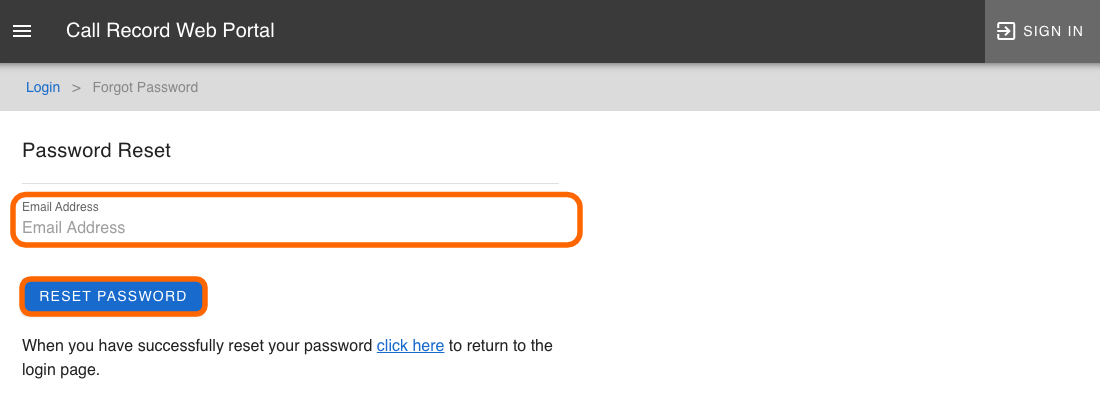
If the email address you have entered is correct you will receive email contain a new password. Please check your Spam/Junk folders.
|
INFO: When the password is reset, It is recommended that you change your password once you have logged in. |
Changing Your Password
Once you have logged back in, from the Menu click on Configuration and then Manage Account
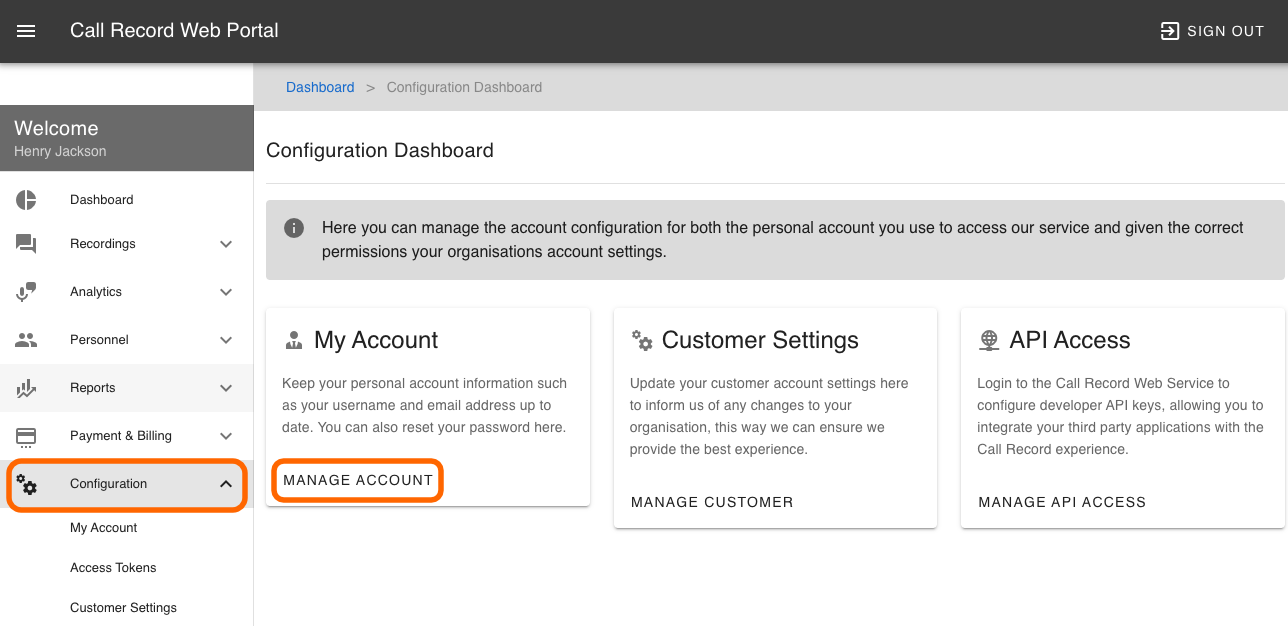
From here type in a new password and confirm the new password. Now click on Save Changes

Your password has now been changed. Click on sign out and then sign in with your new password.