Pod Connect: Meeting
Guides on how to get the most from Pod Connect Meeting. If you do not have the Meeting options, please contact your Service Provider to have this enabled.
- How Do I Start A Meeting From Pod Connect For Desktop?
- How Do I Start A Meeting From Pod Connect For Android/iOS?
- How Do I Start a Meeting From the CommPortal?
- How Do I Schedule A Meeting on Mac OS?
- How Do I Schedule A Meeting on Windows?
- How Do I Schedule A Meeting on iOS/Android Devices?
- How Do I Use Waiting Rooms?
- How Do I Join A Meeting When I Have Received An Invite?
- How Do I Create A Personal Meeting Link (URL)?
- How Do I Recorded A Meeting?
How Do I Start A Meeting From Pod Connect For Desktop?
| INFO: If you do not have the Meeting options, please contact your Service Provider to have this enabled. |
| TIP: You also start a meeting from Pod Connect for Android/iOS or directly from the CommPortal. |
These instructions are the same for both Windows and Mac versions. of Pod Connect.
From Pod Connect for Desktop Mac click on Meetings > Create a Meeting...

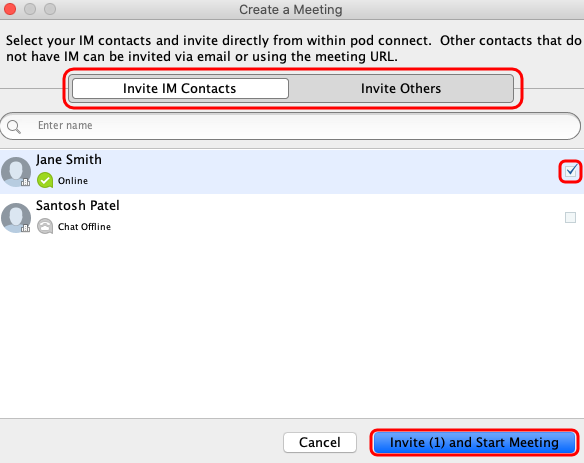
On the Create a Meeting box you can Invite IM Contacts (users within your business group) and/or Invite Others (Send Email Invite and Copy Meeting Link) this will allow you to send an invite via email or copy the link so you can create your own email or send the link by IM/SMS .etc
Select the IM contacts you wish to invite
Click on Invite Others if you would like to invite somebody not on your IM contacts.
To send an email invite click on Send Email Invite. This will open your default email client with a pre-populated email, enter the recipient(s) and send the email.
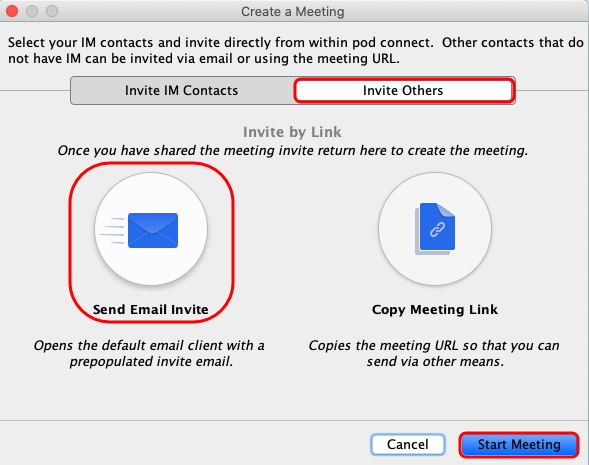
When you are ready to start you can click on Start Meeting.
| INFO: For IM Contacts this will call them directly and a pop up will appear on their screen giving them the options to Join or Ignore the meeting request. This will only work if the IM contact is online, if the contact is offline you will need to choose Invite Others and email or copy the link to them. Invite Others will receive an email with a link to click on. If the email has not arrived please advise them to check spam/junk folders. If other contacts are using an Android or iOS devices the meeting link will require them to download and install the Pod Connect application for that device before they can join. |
How Do I Start A Meeting From Pod Connect For Android/iOS?
| INFO: If you do not have the Meeting options, please contact your Service Provider to have this enabled. |
| TIP: You also start a meeting from Pod Connect for Desktop or directly from the CommPortal. |
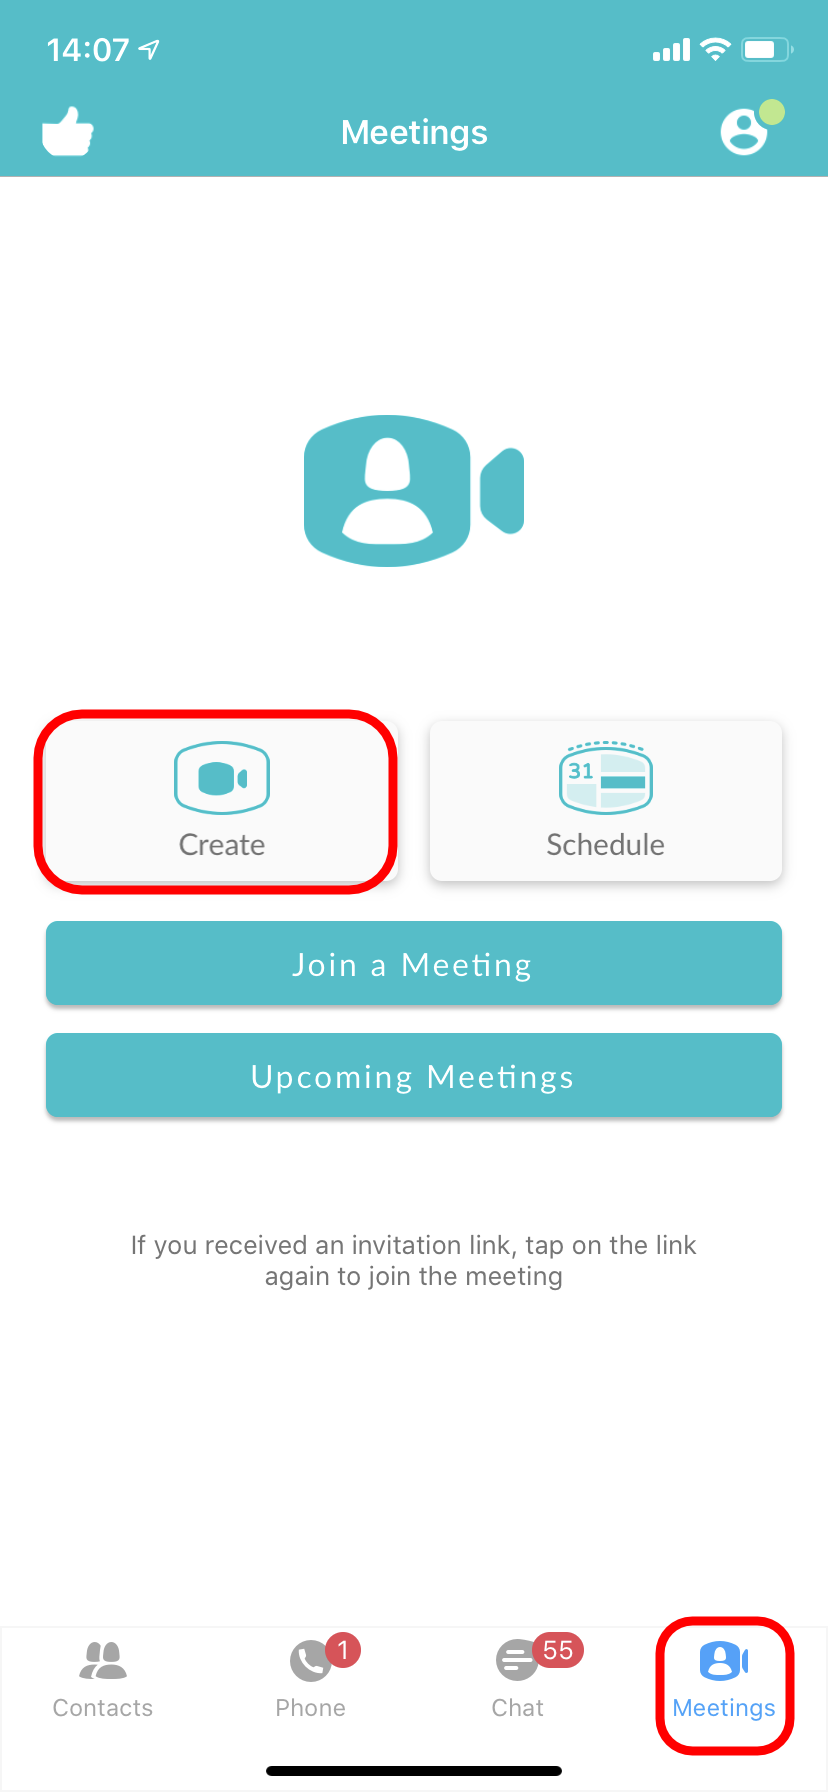
From the Pod Connect for Android/iOS application tap on Meetings at the bottom then Create.
You can Invite IM Contacts (users within your business group) and/or Invite Others (Send Email Invite and Copy Meeting Link) this will allow you to send an invite via email or copy the link so you can create your own email or send the link by IM/SMS .etc
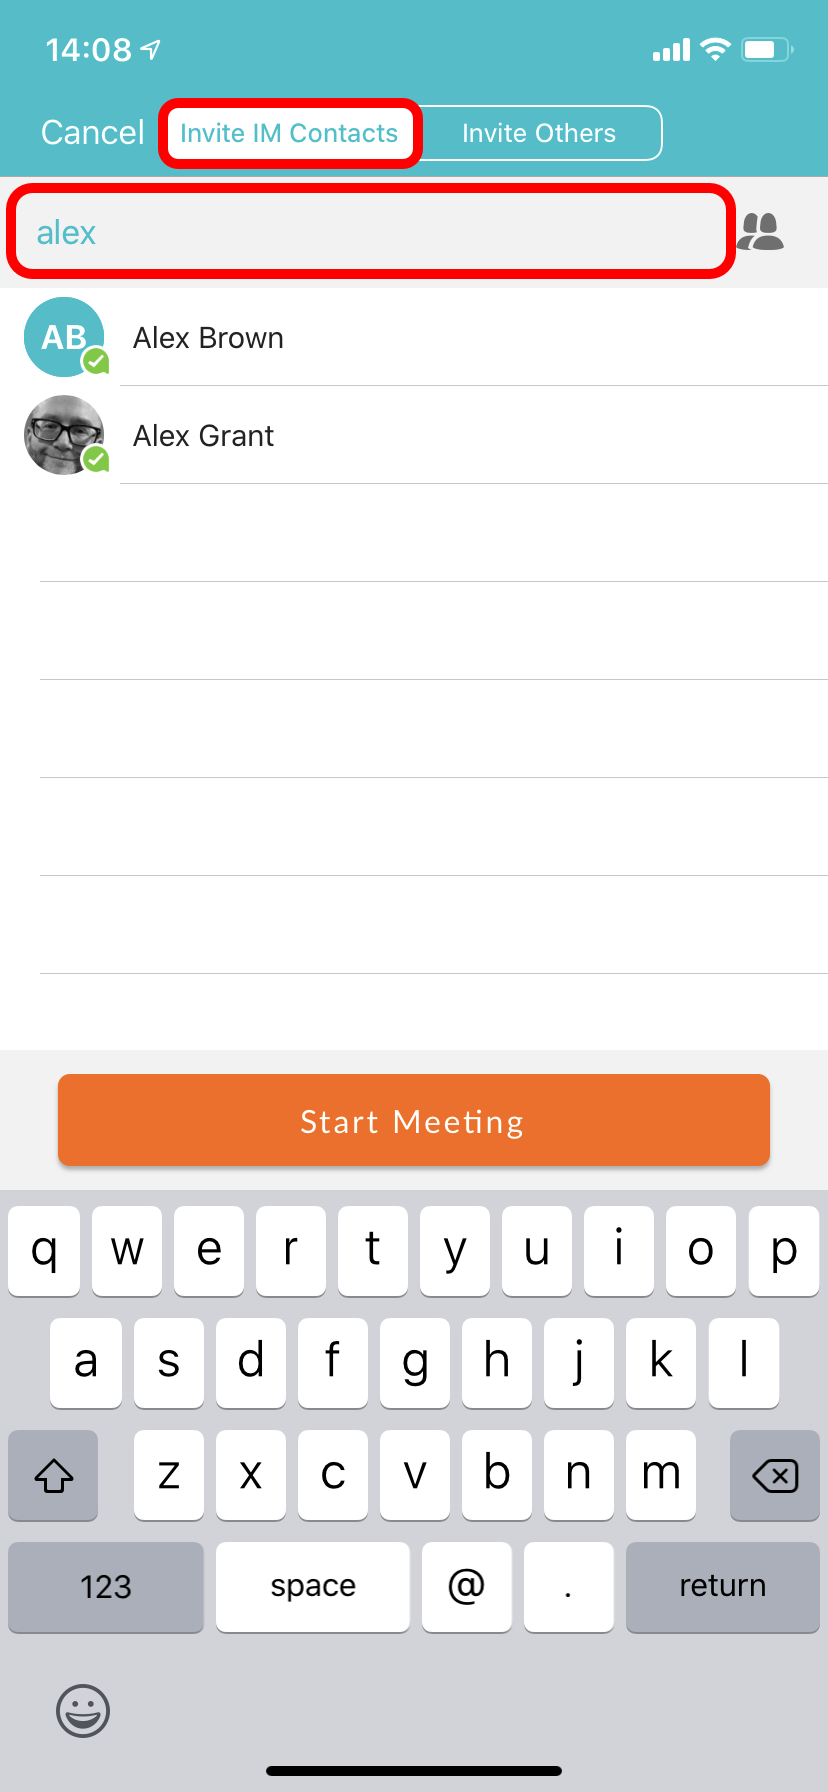
Type the name of a Im Contact and tap to select the IM contact and/or Invite Others
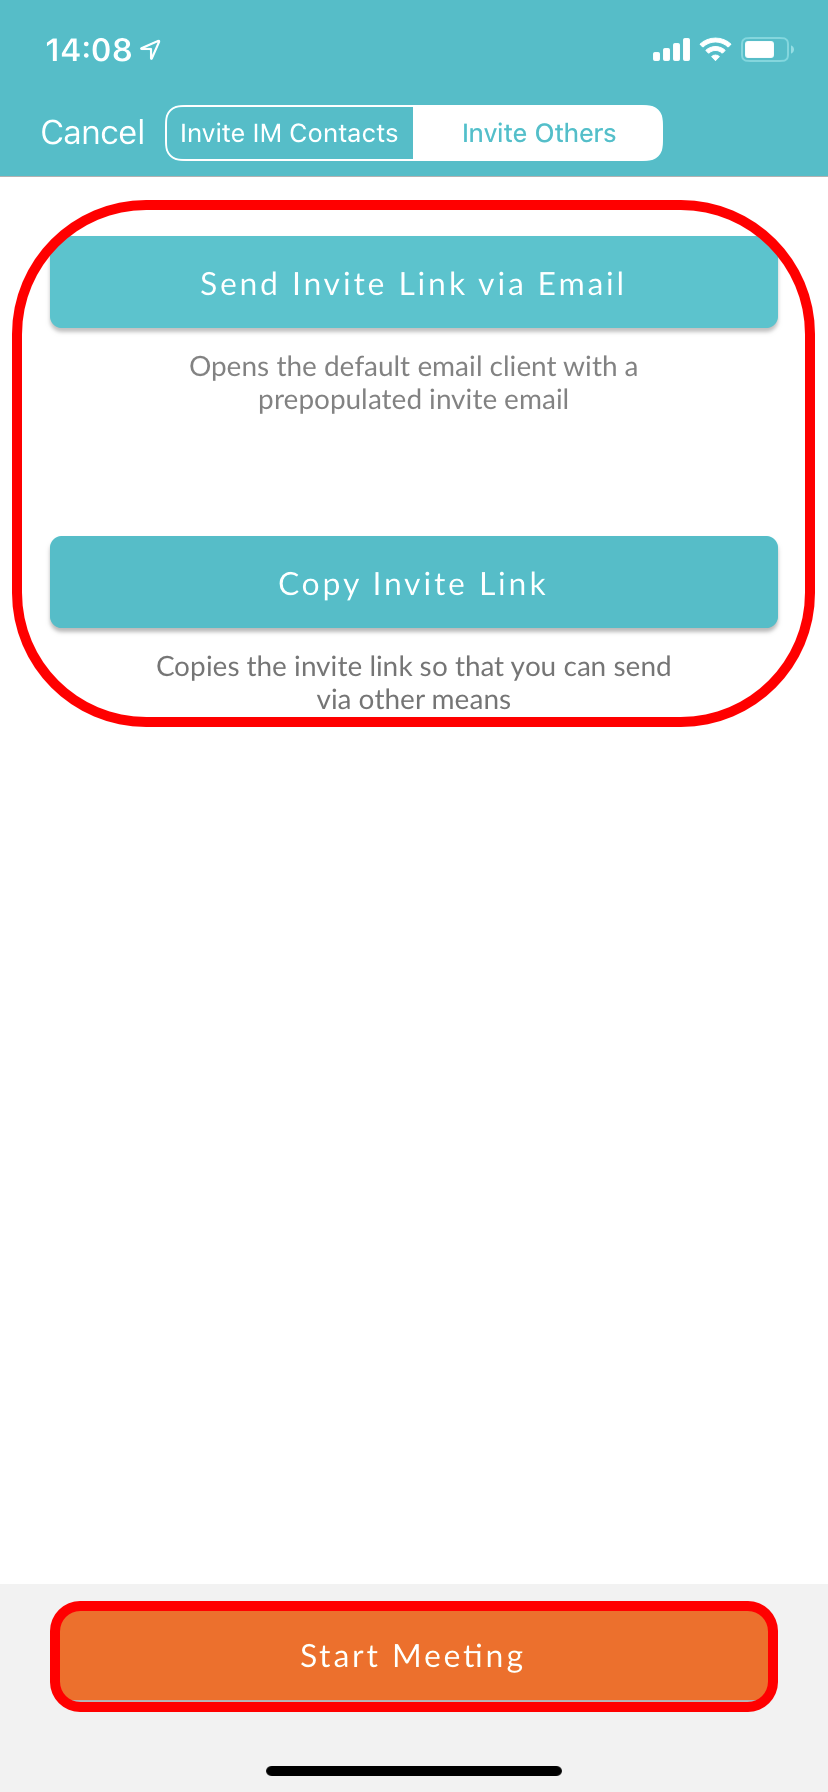
To send an email invite click on Send Invite Link via Email. This will open your default email client with a pre-populated email, enter the recipient(s) and send the email.
When you are ready to start you can click on Start Meeting.
| INFO: For IM Contacts this will call them directly and a pop up will appear on their screen giving them the options to Join or Ignore the meeting request. This will only work if the IM contact is online, if the contact is offline you will need to choose Invite Others and email or copy the link to them. Invite Others will receive an email with a link to click on. If the email has not arrived please advise them to check spam/junk folders. If other contacts are using an Android or iOS devices the meeting link will require them to download and install the Pod Connect application for that device before they can join. |
How Do I Start a Meeting From the CommPortal?
| INFO: If you do not have the Meeting options, please contact your Service Provider to have this enabled. |
| TIP: You also start a meeting from Pod Connect for Android/iOS or Pod Connect for Desktop. |
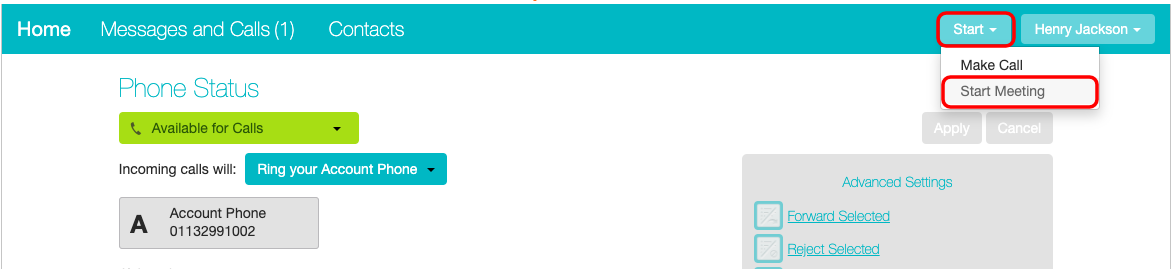
Once logged into the CommPortal click on Start then Start Meeting.
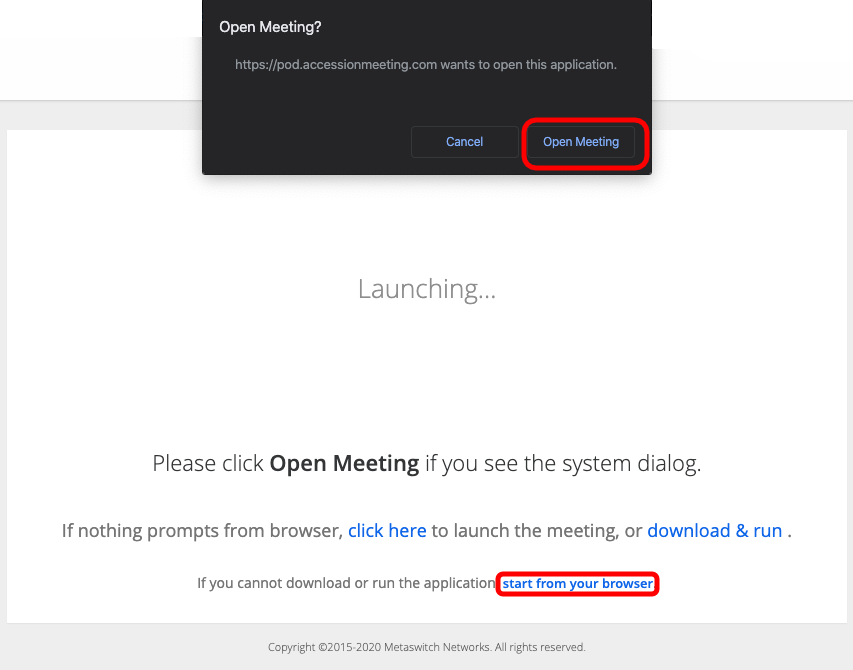
Depending on your web browser a new window/tab will open. Click open meeting.
|
INFO: If have opened CommPortal on a laptop or desktop pc that already has PodConnect for Desktop installed it will prompt to open the Pod Connect for Desktop application or you can choose to start from your browser. |
The meeting will be started and you will be the only participant.
|
INFO: Depending on your computer setup you be prompted to use phone call or use computer audio. This is required so you can participate in the meeting. If you do not have a microphone and/or speakers you should choose the phone call option. |
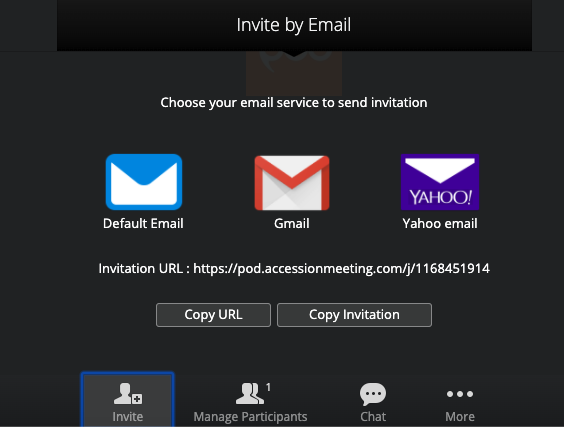
Now you will be able to invite others to your meeting. Click on Invite at the bottom of the screen.

Depending on wether the meeting was stated in your browser or Pod Connect for Desktop the option may differ.
- From browser you will see the following, Invite by Email choose how you would like to send the invite. Either by email or you can copy the link.
- From the Pod Connect for Desktop application this will open a new window, Invite Others to Meeting
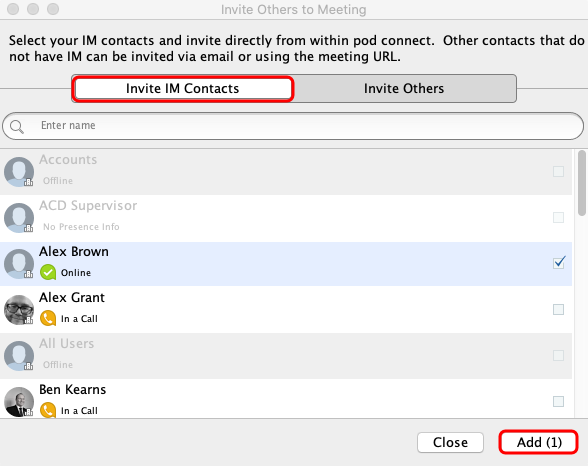
On the Invite Others to Meeting box you can Invite IM Contacts (users within your business group) and/or Invite Others (Send Email Invite and Copy Meeting Link) this will allow you to send an invite via email or copy the link so you can create your own email or send the link by IM/SMS .etc
Select the IM contacts you wish to invite

Click on Invite Others if you would like to invite somebody not on your IM contacts.
To send an email invite click on Add. This will open your default email client with a pre-populated email, enter the recipient(s) and send the email.
| INFO: For IM Contacts this will call them directly and a pop up will appear on their screen giving them the options to Join or Ignore the meeting request. This will only work if the IM contact is online, if the contact is offline you will need to choose Invite Others and email or copy the link to them. Invite Others will receive an email with a link to click on. If the email has not arrived please advise them to check spam/junk folders. If other contacts are using an Android or iOS devices the meeting link will require them to download and install the Pod Connect application for that device before they can join. |
As your meeting has already started you will not see a Start Meeting button.
How Do I Schedule A Meeting on Mac OS?
| INFO: If you do not have the Meeting options, please contact your Service Provider to have this enabled. |
To schedule a Meeting from Pod Connect for Desktop for Mac OS
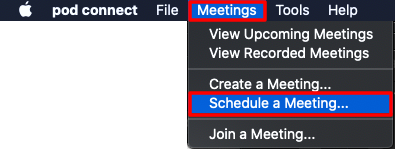
From Pod Connect click on Meetings > Schedule
In the Schedule A New Meeting window you will be able to set your Meeting requirements
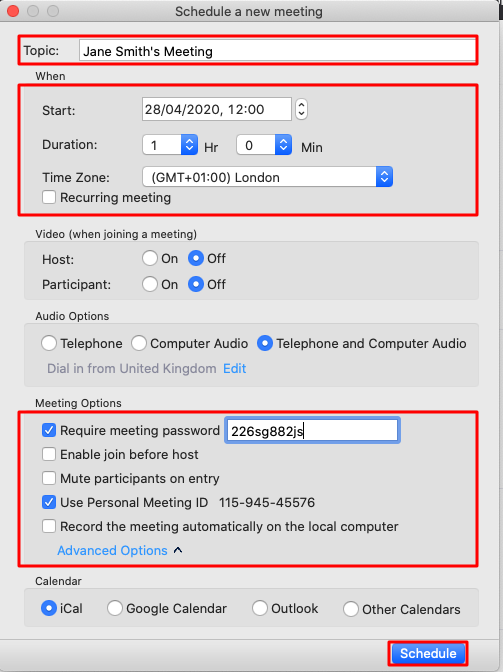
- Topic: Set the name or subject of the Meeting
- When: Pick the Start Date & Time, Duration, this does not have be an exact time this is only an indication of how long you expect the Meeting to last. If this is a recurring Meeting tick the Recurring meeting check box.
- Video: By default when joining a Meeting video is turned off until the Host or Participant turns its on.
- Audio Options: Recommended to leave as default Telephone and Computer Audio
-
Meeting Options: Click on Advanced Options to show all options
- Require meeting password: We recommend that all scheduled Meetings are password protected.
- Enable join before host: Enabling this option will require a password to be set.
- Mute participants on entry: The host can unmute participants when ready
- Use Personal Meeting ID: This will allow you to schedule a Meeting using your Personal Meeting ID or your Personal Link see the How Do I Create A Personal Meeting Link? documentation.
- Record the meeting automatically on the local computer: The meeting will be recorded and saved on your local computer, see How Do I Record A Meeting? for further information.
- Calendar: This will save the Meeting in your calendar.
Click on Schedule to save your Meeting. You can start the Meeting when ready. You can either invite participants directly from the Meeting or send them the Meeting ID or web address.
|
INFO: When scheduling a one off (Not recurring) meeting and not using the Personal Meeting ID this will generate a random Meeting ID that can only be used once. Once the host has ended the Meeting that Meeting ID becomes invalid. Enable join before host: For this feature to work you must first disable Waiting Room in the Advanced Settings see the Start Up Guide - Recommend Setting For Pod Connect for Desktop for further information. |
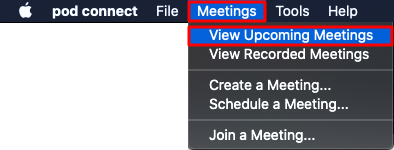
To view your upcoming Meetings click on Meetings > View Upcoming Meetings
This window will list all upcoming Meetings, from here you can either Start, Edit or Delete the meeting or Copy the meeting invite which will allow you to send as an email.
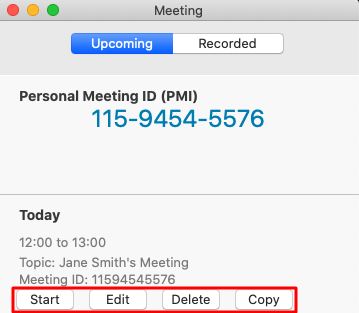
| INFO: Depending on if you have saved the meeting to your Calendar you may receive a notification from your calendar that the Meeting is about to start. Pod Connect will not automatically start the meeting. If you think you may not be able to attend but would like the Meeting to go ahead then you should enable Join Before Host. |
How Do I Schedule A Meeting on Windows?
| INFO: If you do not have the Meeting options, please contact your Service Provider to have this enabled. |
To schedule a Meeting from Pod Connect for Desktop for Windows
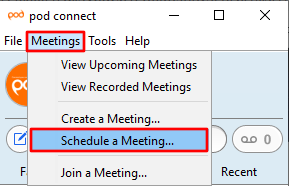
From Pod Connect click on Meetings > Schedule
In the Schedule A New Meeting window you will be able to set your Meeting requirements

- Topic: Set the name or subject of the Meeting
- When: Pick the Start Date & Time, Duration, this does not have be an exact time this is only an indication of how long you expect the Meeting to last. If this is a recurring Meeting tick the Recurring meeting check box.
- Video: By default when joining a Meeting video is turned off until the Host or Participant turns its on.
- Audio Options: Recommended to leave as default Telephone and Computer Audio
-
Meeting Options: Click on Advanced Options to show all options
- Require meeting password: We recommend that all scheduled Meetings are password protected.
- Enable join before host: Enabling this option will require a password to be set.
- Mute participants on entry: The host can unmute participants when ready
- Use Personal Meeting ID: This will allow you to schedule a Meeting using your Personal Meeting ID or your Personal Link see the How Do I Create A Personal Meeting Link? documentation.
- Record the meeting automatically on the local computer: The meeting will be recorded and saved on your local computer, see How Do I Record A Meeting? for further information.
- Calendar: This will save the Meeting in your calendar.
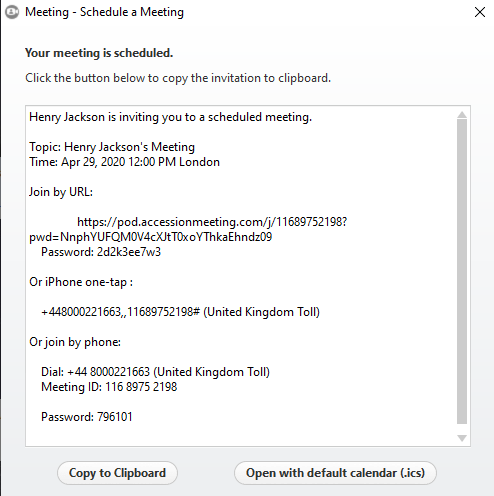
Click on Schedule to save your Meeting. You can start the Meeting when ready. You can either invite participants directly from the Meeting or send them the Meeting ID or web address. A window with the Meeting details that can be copied will appear.
|
INFO: When scheduling a one off (Not recurring) meeting and not using the Personal Meeting ID this will generate a random Meeting ID that can only be used once. Once the host has ended the Meeting that Meeting ID becomes invalid. Enable join before host: For this feature to work you must first disable Waiting Room in the Advanced Settings see the Start Up Guide - Recommend Setting For Pod Connect for Desktop for further information. |
To view your upcoming Meetings click on Meetings > View Upcoming Meetings

This window will list all upcoming Meetings, from here you can either Start, Edit or Delete the meeting or Copy the meeting invite which will allow you to send as an email.
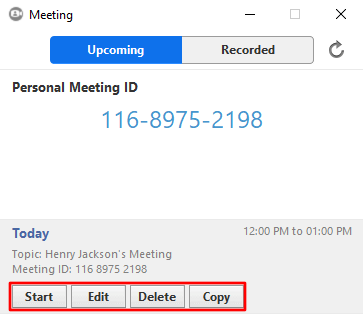
| INFO: Depending on if you have saved the meeting to your Calendar you may receive a notification from your calendar that the Meeting is about to start. Pod Connect will not automatically start the meeting. If you think you may not be able to attend but would like the Meeting to go ahead then you should enable Join Before Host. |
How Do I Schedule A Meeting on iOS/Android Devices?
| INFO: If you do not have the Meeting options, please contact your Service Provider to have this enabled. |
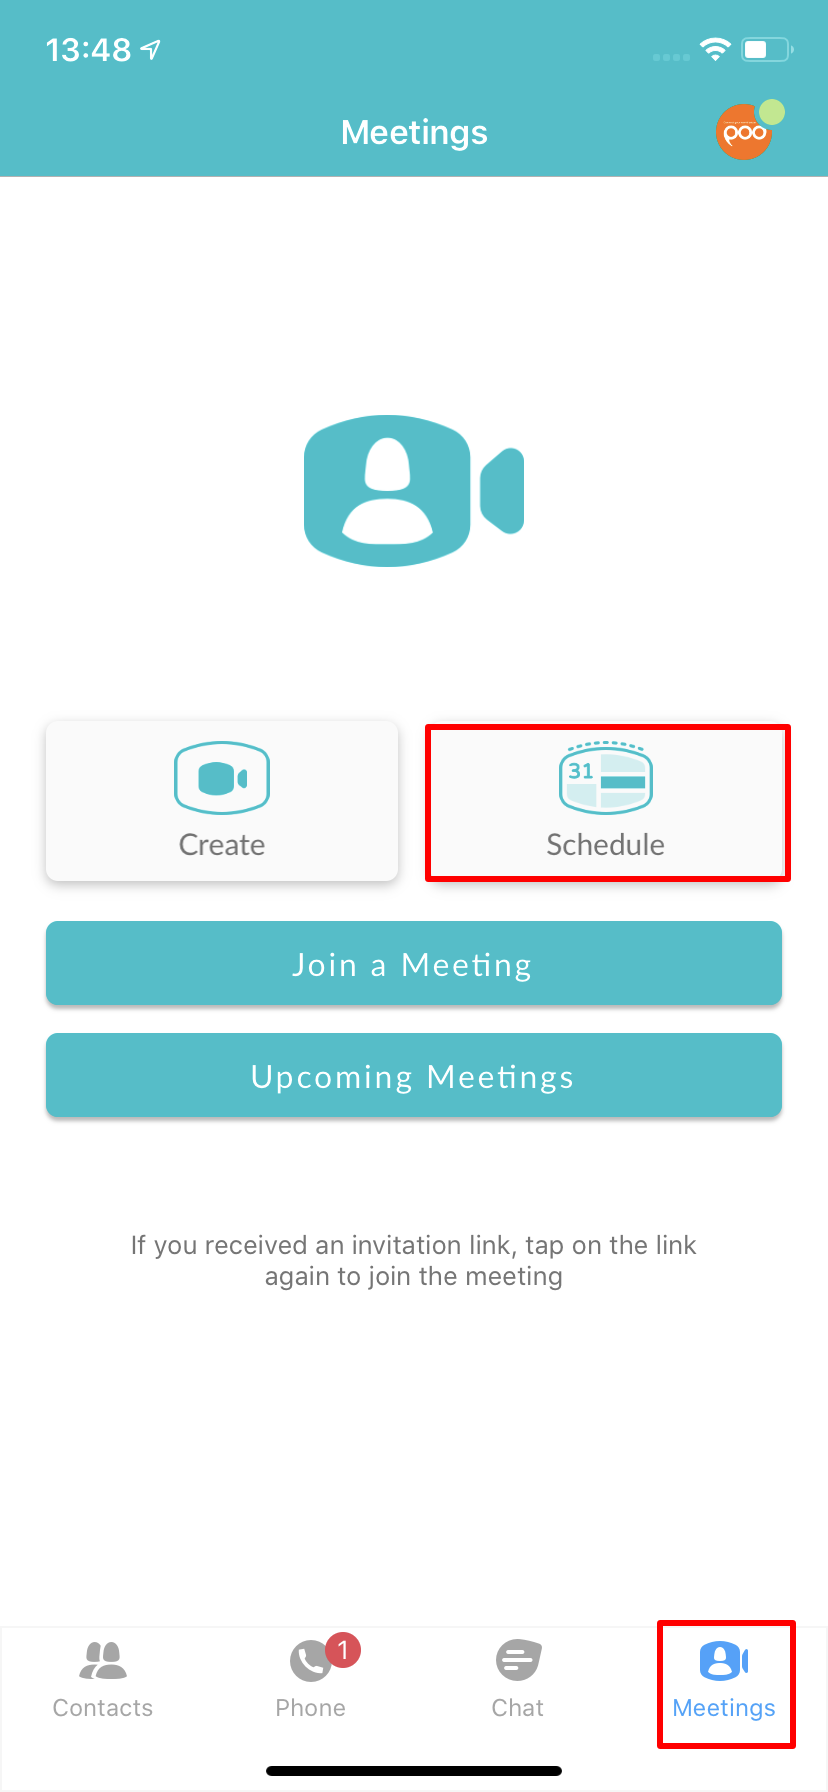
To schedule a Meeting from iOS or Android devices open the Pod Connect application the tap on the Meetings icon then tap on Schedule.
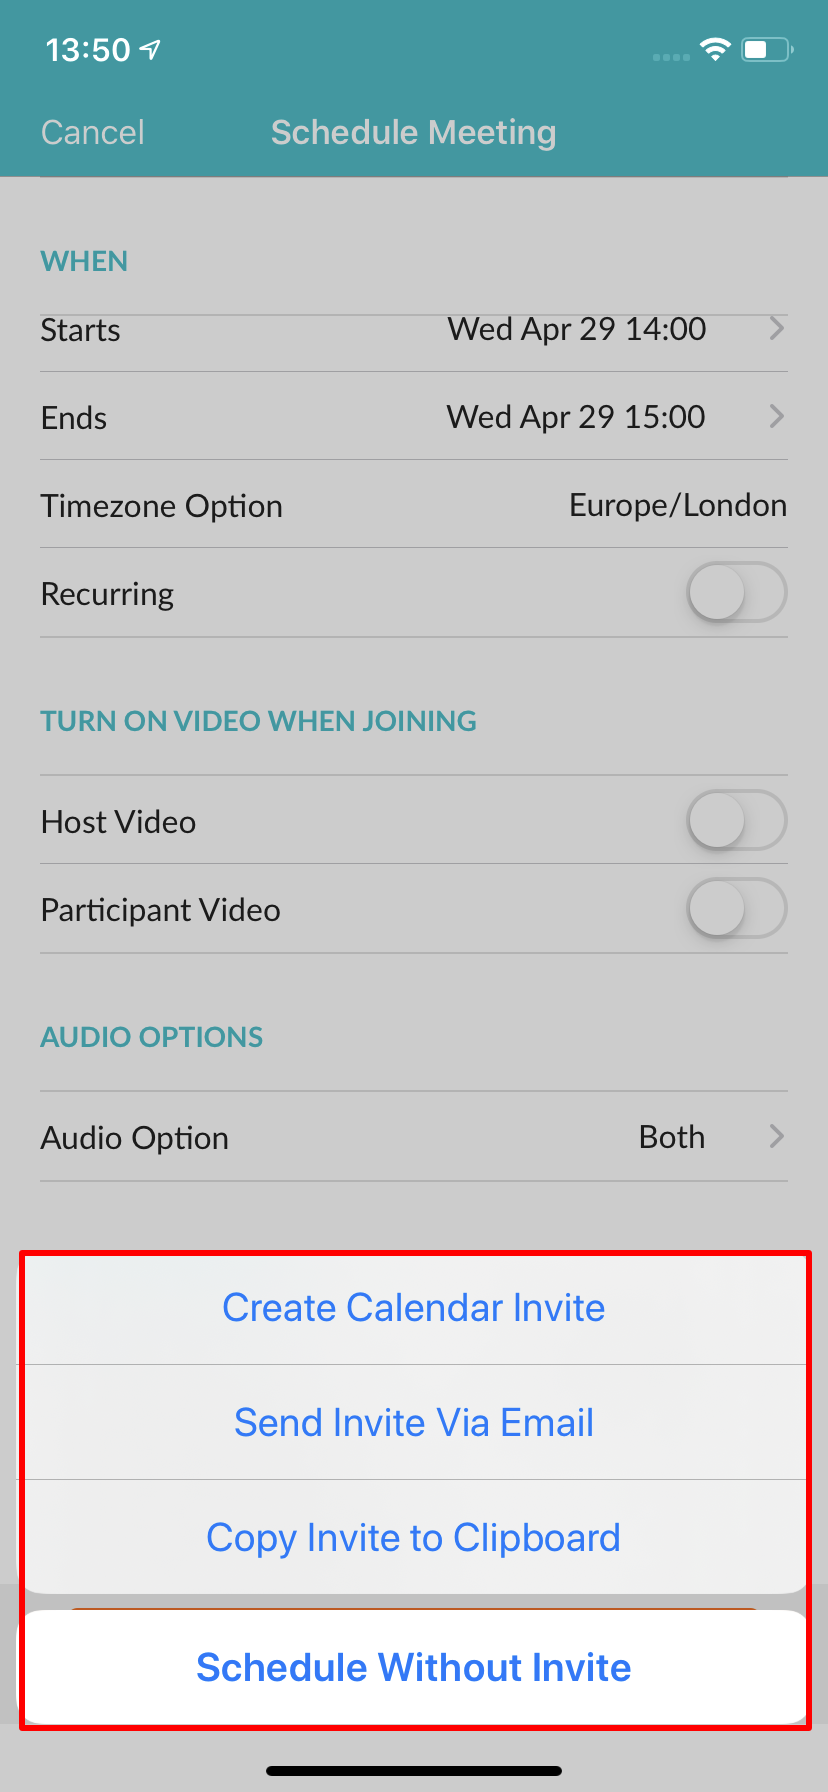
In the Schedule Meeting window you will be able to set your Meeting requirements

- Topic: Set the name or subject of the Meeting
- When: Pick the Start Date & Time, Duration, this does not have be an exact time this is only an indication of how long you expect the Meeting to last. If this is a recurring Meeting switch on the Recurring meeting.
- Video: By default when joining a Meeting video is turned off until the Host or Participant turns its on.
- Audio Options: Recommended to leave as default both
-
Meeting Options: Click on Advanced Options to show all options
- Require meeting password: We recommend that all scheduled Meetings are password protected.
- Enable join before host: Enabling this option will require a password to be set.
- Use Personal Meeting ID: This will allow you to schedule a Meeting using your Personal Meeting ID or your Personal Link see the How Do I Create A Personal Meeting Link? documentation.
Click on Schedule to save your Meeting. You will now have the options to Create Calendar Invite, Send Invite Via Email, Copy Invite To Clipboard or Schedule Without Invite
|
INFO: When scheduling a one off (Not recurring) meeting and not using the Personal Meeting ID this will generate a random Meeting ID that can only be used once. Once the host has ended the Meeting that Meeting ID becomes invalid. Enable join before host: For this feature to work you must first disable Waiting Room in the Advanced Settings see the Start Up Guide - Recommend Setting For Pod Connect for Desktop for further information. |
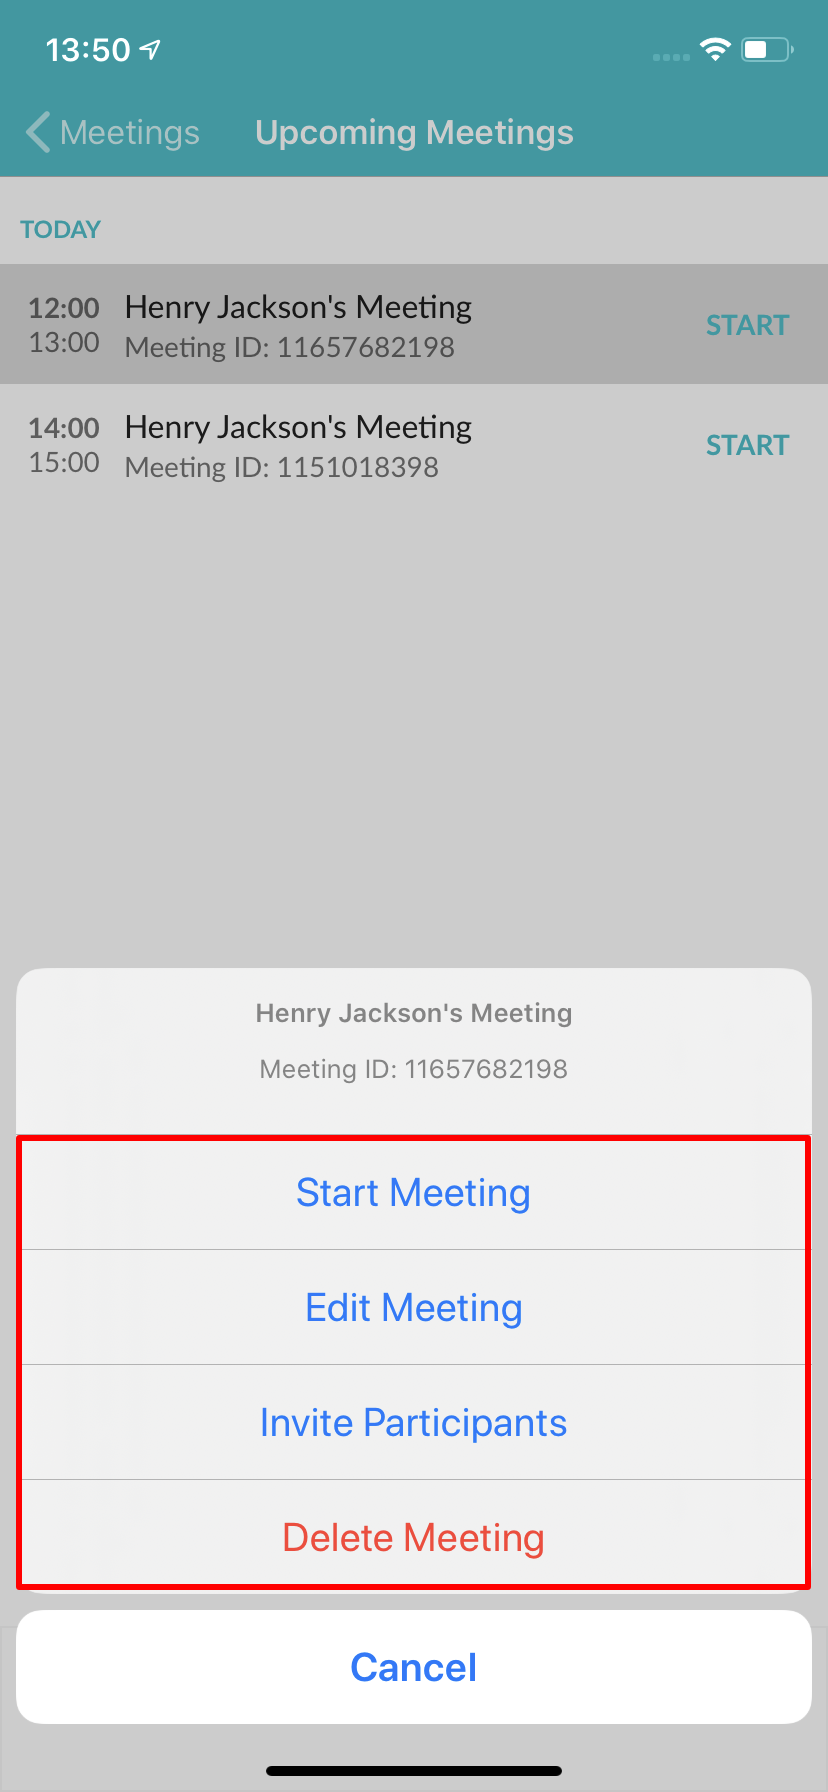
To view your upcoming Meetings tap on Meetings > Upcoming Meetings
From you can either Start Meeting, Edit Meeting, Invite Participants or Delete Meeting
| INFO: Depending on if you have saved the meeting to your Calendar you may receive a notification from your calendar that the Meeting is about to start. Pod Connect will not automatically start the meeting. If you think you may not be able to attend but would like the Meeting to go ahead then you should enable Join Before Host. |
How Do I Use Waiting Rooms?
Waiting rooms have been enabled by default, this is to help protect your meeting from unintended access.
When you Start/Schedule a Meeting all participants when entering the meeting will be placed in the Waiting Room before been allowed to enter the Meeting.
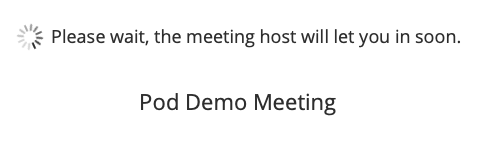
The participant will see the following message on their screen and the name will be the name of the meeting.
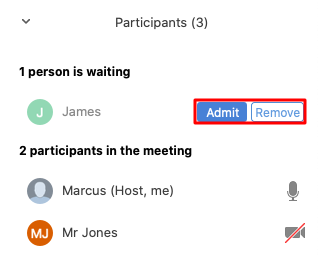
The will start the Meeting as normal, when a participant enters the meeting you see the following notification advise you that somebody has entered the Waiting Room.
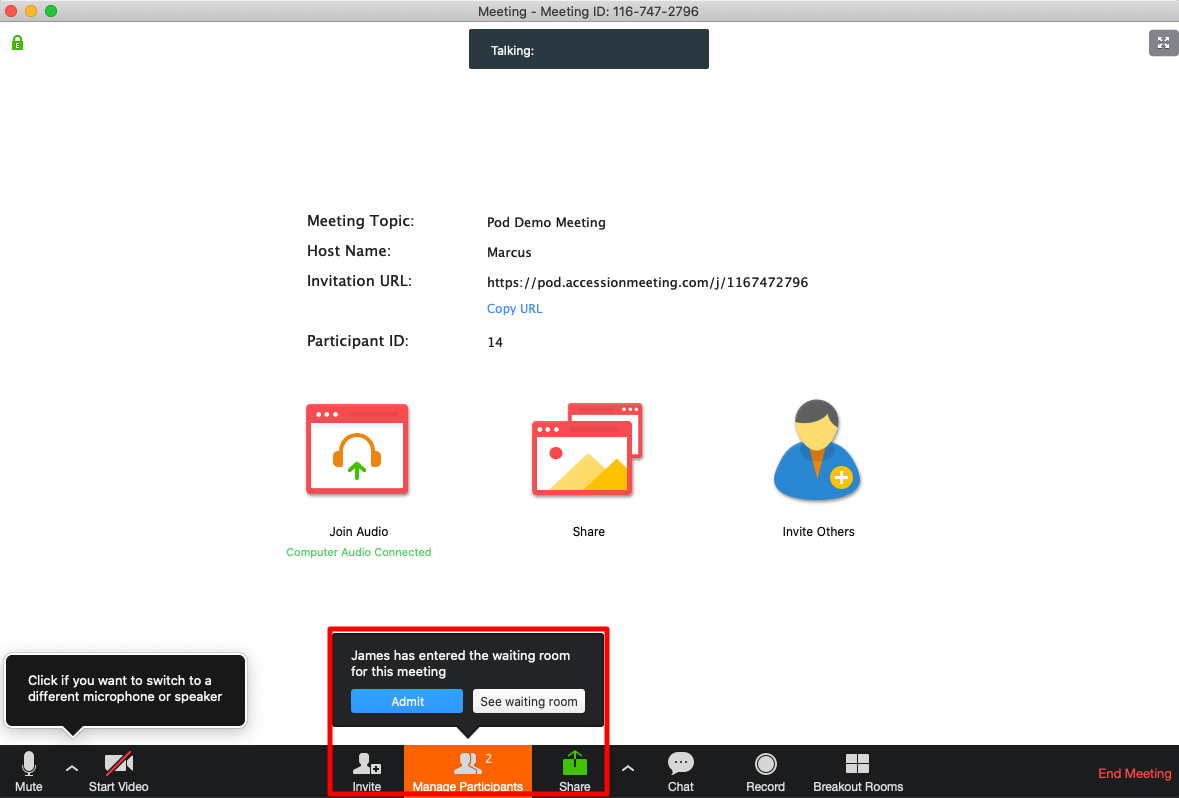
From you can either click Admit this will allow the participant "James" to enter the Meeting or you can click on See waiting room this will open the participants window where you manage all participants.
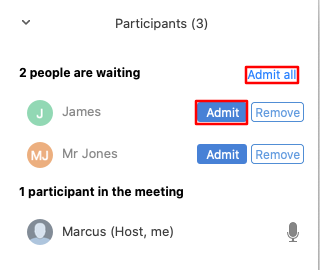
In the participants window you can Admit and Remove participants from the waiting room. To admit a participant click on Admit or Admit all
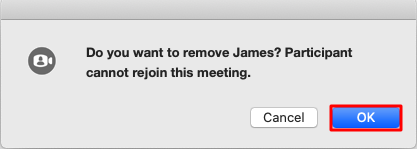
To remove a participant from the Waiting Room click on Remove a popup message will ask you to confirm this click OK
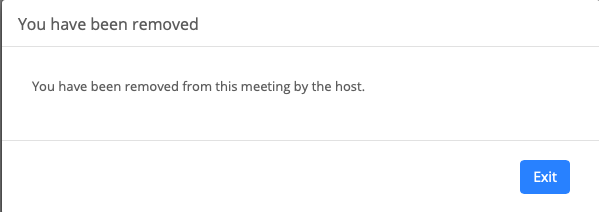
The participant has now been removed, they will see the following message
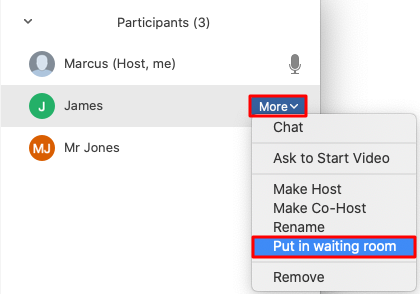
From the participant window you can also put participants back into the waiting room, select the participant and click on More then Put in waiting room
The participant has now been placed back in the Waiting Room and you can allow the participant back or remove them when you are ready by clicking either the Admit or Remove buttons.
How Do I Join A Meeting When I Have Received An Invite?
|
INFO: Due to updated security settings by default when you join a meeting you will be placed in a Waiting Room until the host allows you into the meeting. See the How Do I Use Waiting Rooms? documentation. |
Joining a meeting is straight forward. Their are several ways this can be done:
- From the Pod Connect Application (Desktop/Android/iOS).
- From the meeting link (URL).
- From a phone
Users Within Your Business Group
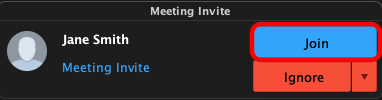
If the meeting invite from somebody within your Business Group and you are currently online at the time of the meeting a pop will appear on screen asking you Join or Ignore the meeting invite.
Click on Join.
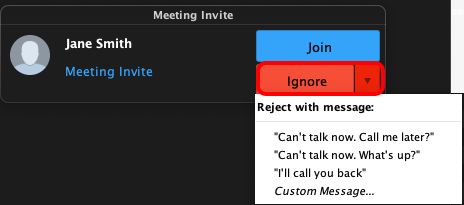
Or click Ignore, you can choose to reply back with a message.
If you have received a Meeting Link by email or other means and you also use the Pod Connect application (Desktop/Android/iOS)
The email will look like this:
To join from Pod Connect for Desktop you can either click on the link which will open in your default web browser giving you the option to either Open Meeting or Download & Run or start from your browser. Click on Open Meeting will launch the meeting directly from the Pod Connect for Desktop application.
Within Pod Connect for Desktop you can also join the meeting using the Meeting ID click on File > Join Meeting enter the Meeting ID and click on Join.

To join from Pod Connect for Android/iOS on the same Business Group and you are online then you will have the option to either Join or Ignore the meeting invite as mentioned previously.
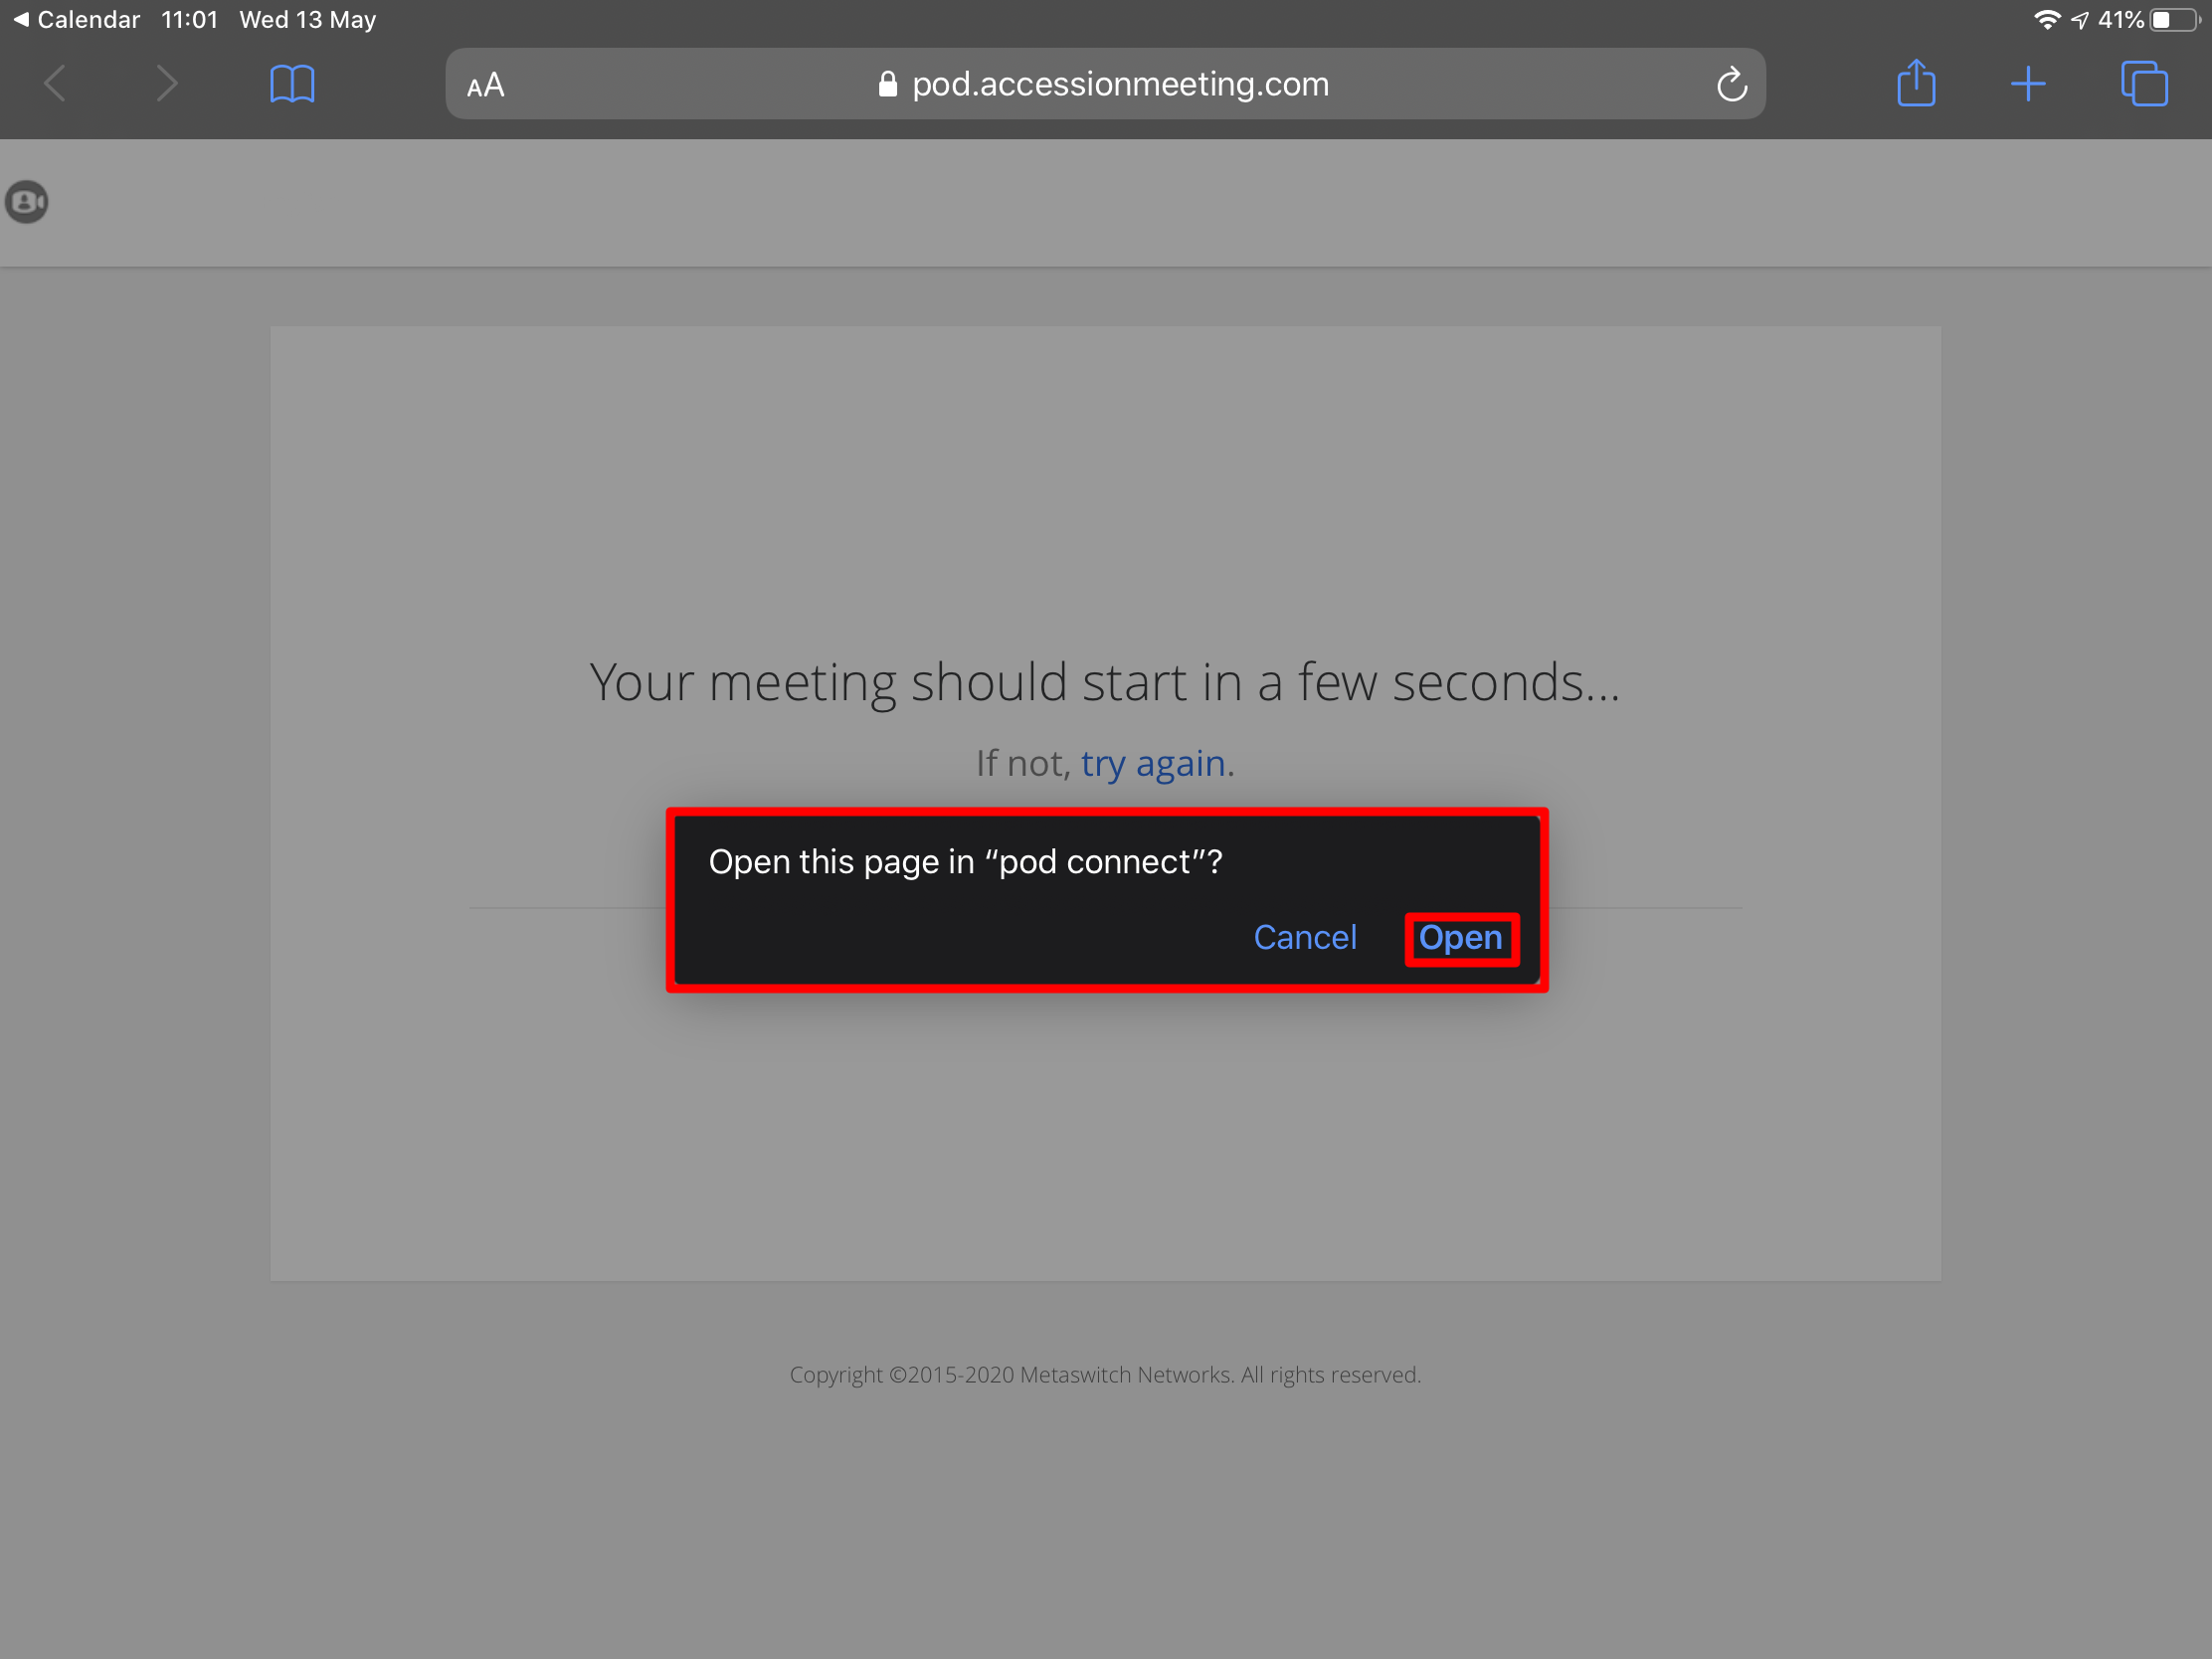
If you have received the Meeting Link via email on you mobile device and have Pod Connect installed on this device you can click on the Meeting URL (link) within the email:
For iOS devices this will open Safari by default and it will ask you to Open this page in "pod connect" click on Open to join the Meeting.
For Android devices you may see a pop up asking to Open in pod connect or Chrome. Choose pod connect.
If you choose Chrome you will see the following web page tap on Join Meeting
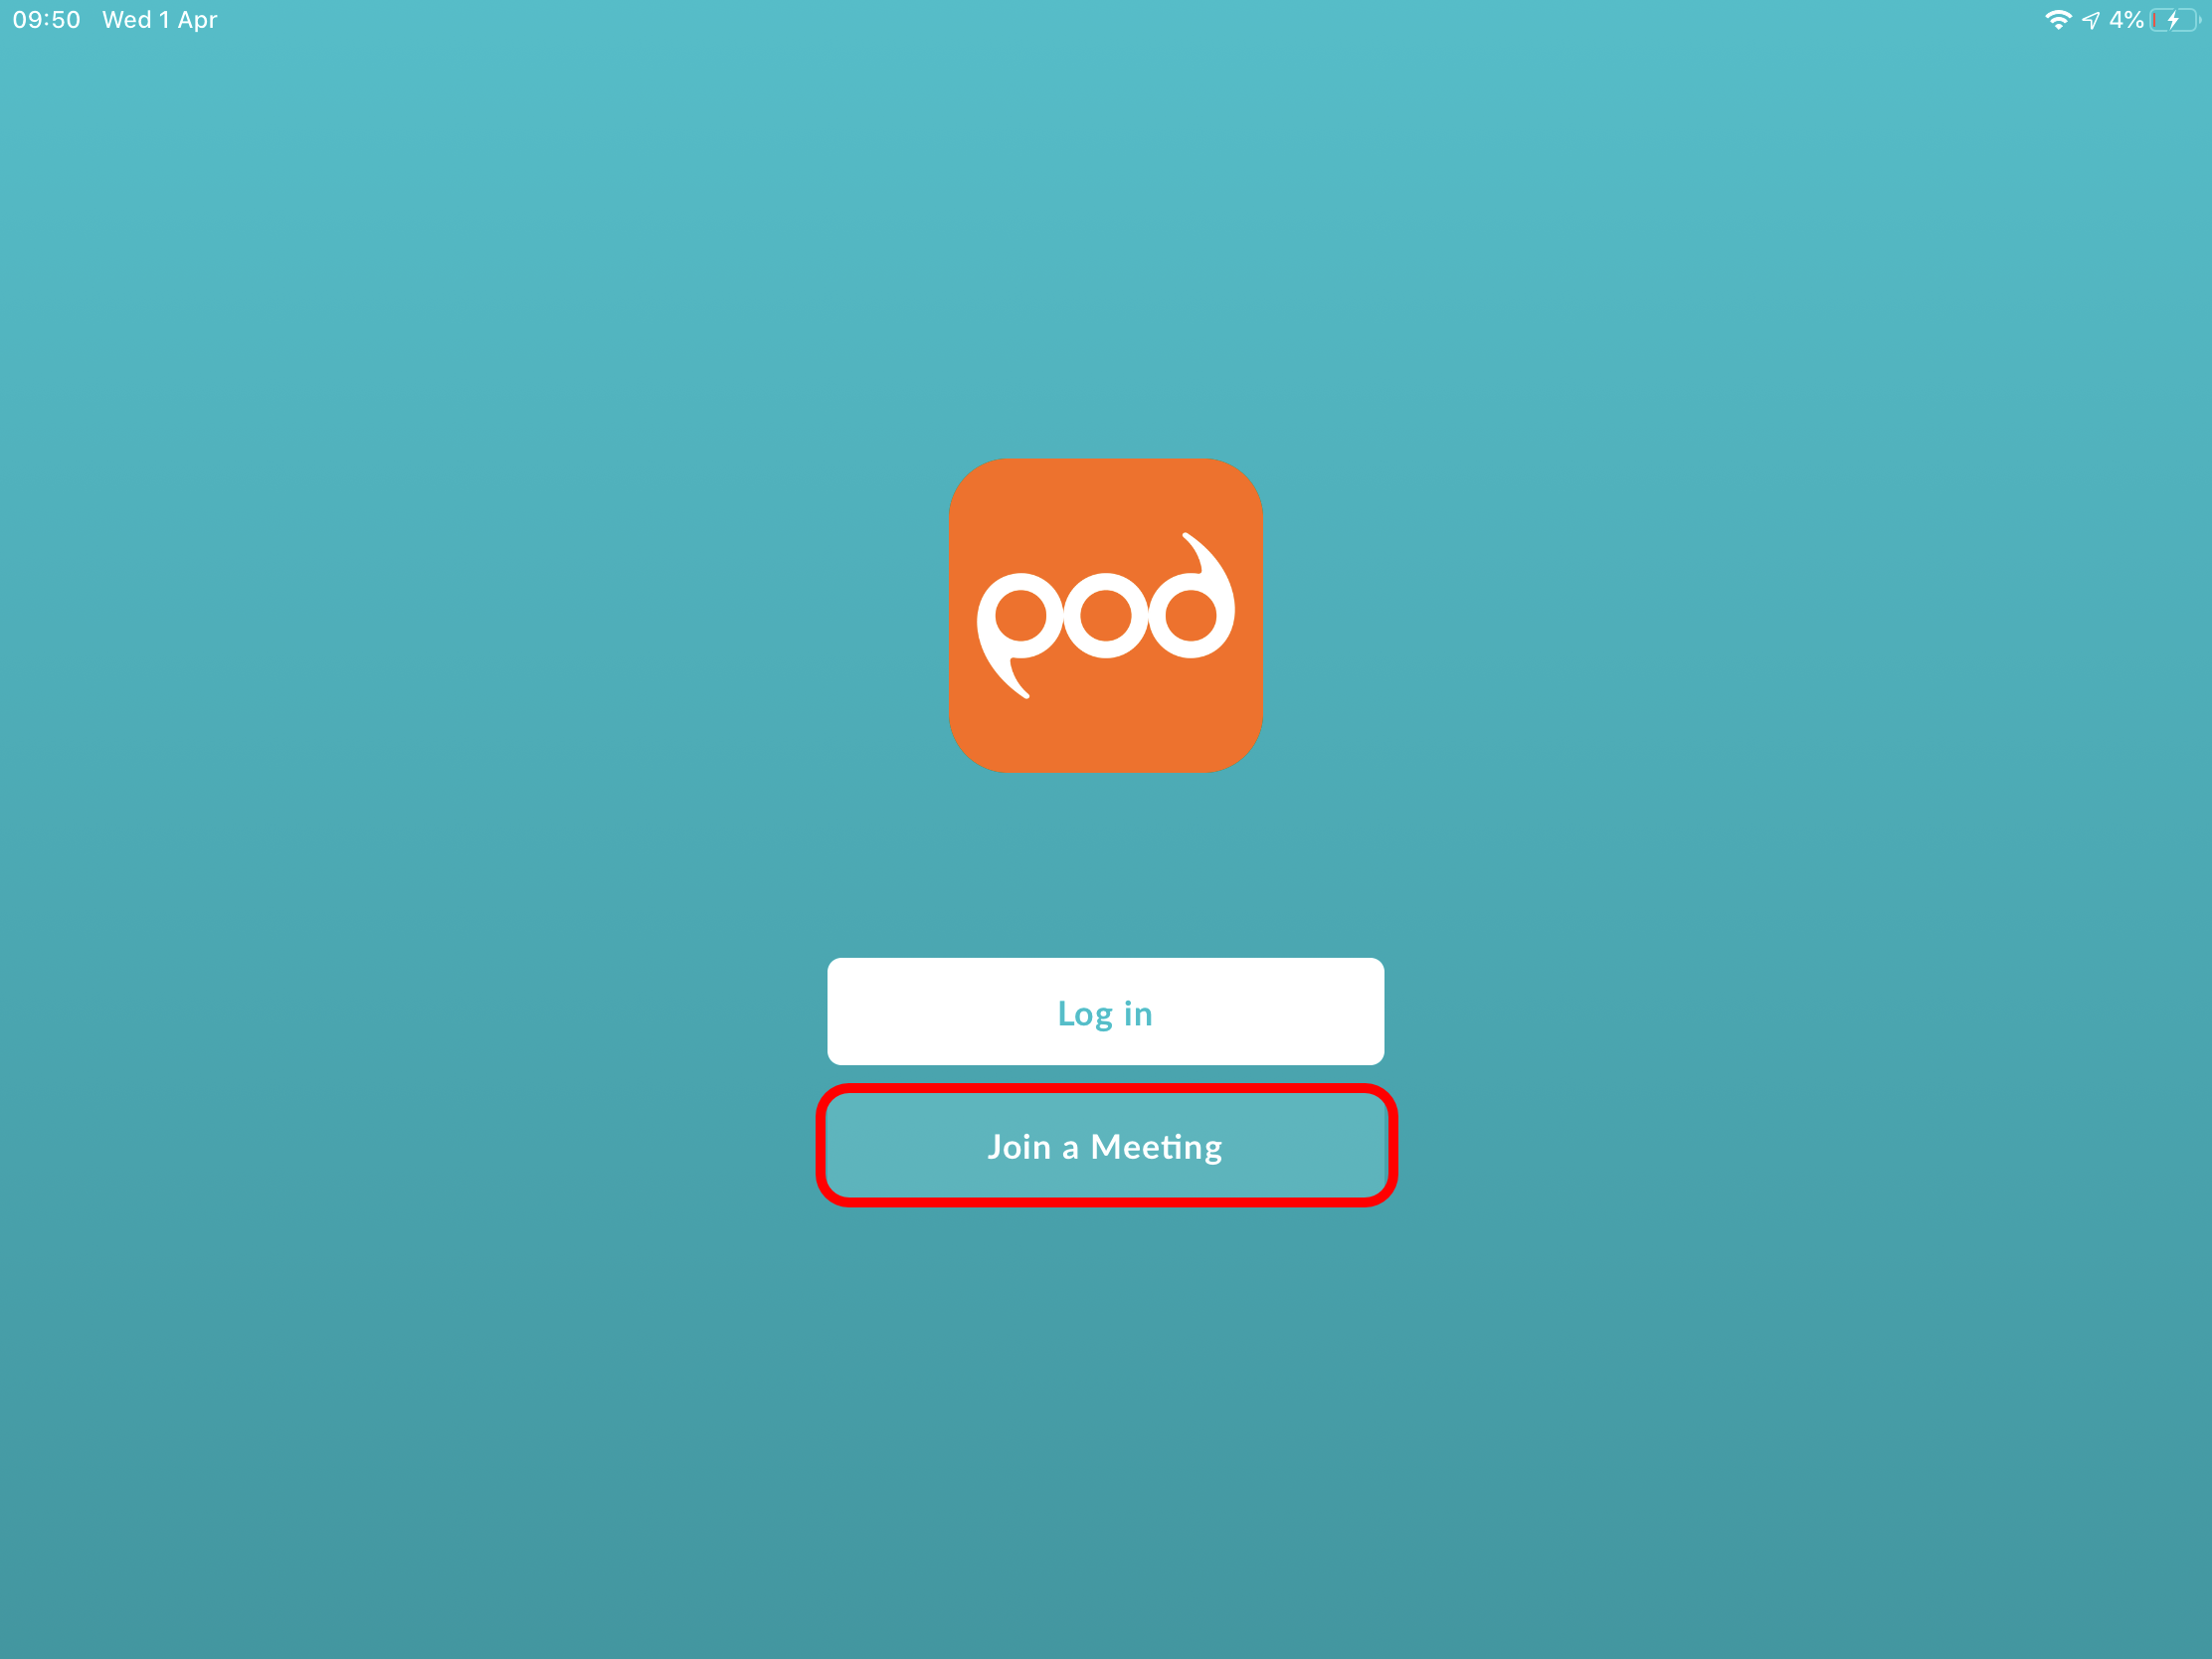
You can also join a Meeting by using the Meeting ID you will first need to log out of pod connect.
On the main screen tap on Join a Meeting instead of Log in.
Next enter your Name and the Meeting ID, tap on Join Meeting

Finally you can also join a meeting by phoning in. Call the phone number within the invite email, when prompted enter the Meeting ID. This will only allow you to listen and talk within the meeting.
|
INFO: The above guide is directed for users that do not have the option to create meetings. If you have the option to create Meetings then joining Meetings is slightly different.
For Pod Connect For Desktop - You can join via the Meeting Link as mentioned above or within the application click on Meetings > Join Meeting... For Pod Connect for Android/iOS - Tap on the Meetings tab at the bottom then tap on Join a Meeting |
Users Not Within Your Business Group
If you are inviting someone outside of your Business Group, they will have received the Meeting Link via email or other means.
Accessing the Meeting from a Laptop/PC The invitee can click on the Meeting Link this will open a web page with the following options:
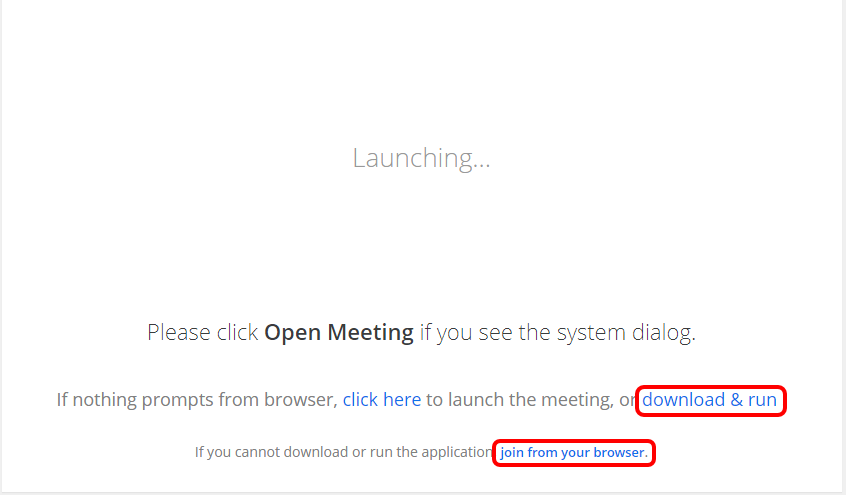
The first time you join a meeting you will have the option to Download & run will download the AccessionMeetingLauncher (this will be same on both Windows and MAC) install the launcher and the Meeting will start. Enter you name in the popup box and click Join.
Installing this application on to your computer will make joining any future meetings quicker, easier and allow full access to all features. As a pop up will appear to Open Meeting.
|
INFO: To use all the Meeting features you MUST install the AccessionMeetingLauncher for MAC or Windows. Note that the meeting experience from the join from browser is limited. |
If you prefer not to install the Meeting application and if the option is available you can choose join from your browser.
|
INFO: Depending on your computer/laptop settings your web browser may prompt you to allow access to your WebCam and Microphone and/or folders is you are sharing any documents. Please click on Allow. |
Mobile users that do not have pod connect installed
If are using an iOS device when you receive the meeting invite and tap on the meeting url you will see the following page:
This is not a fault, tap OK.

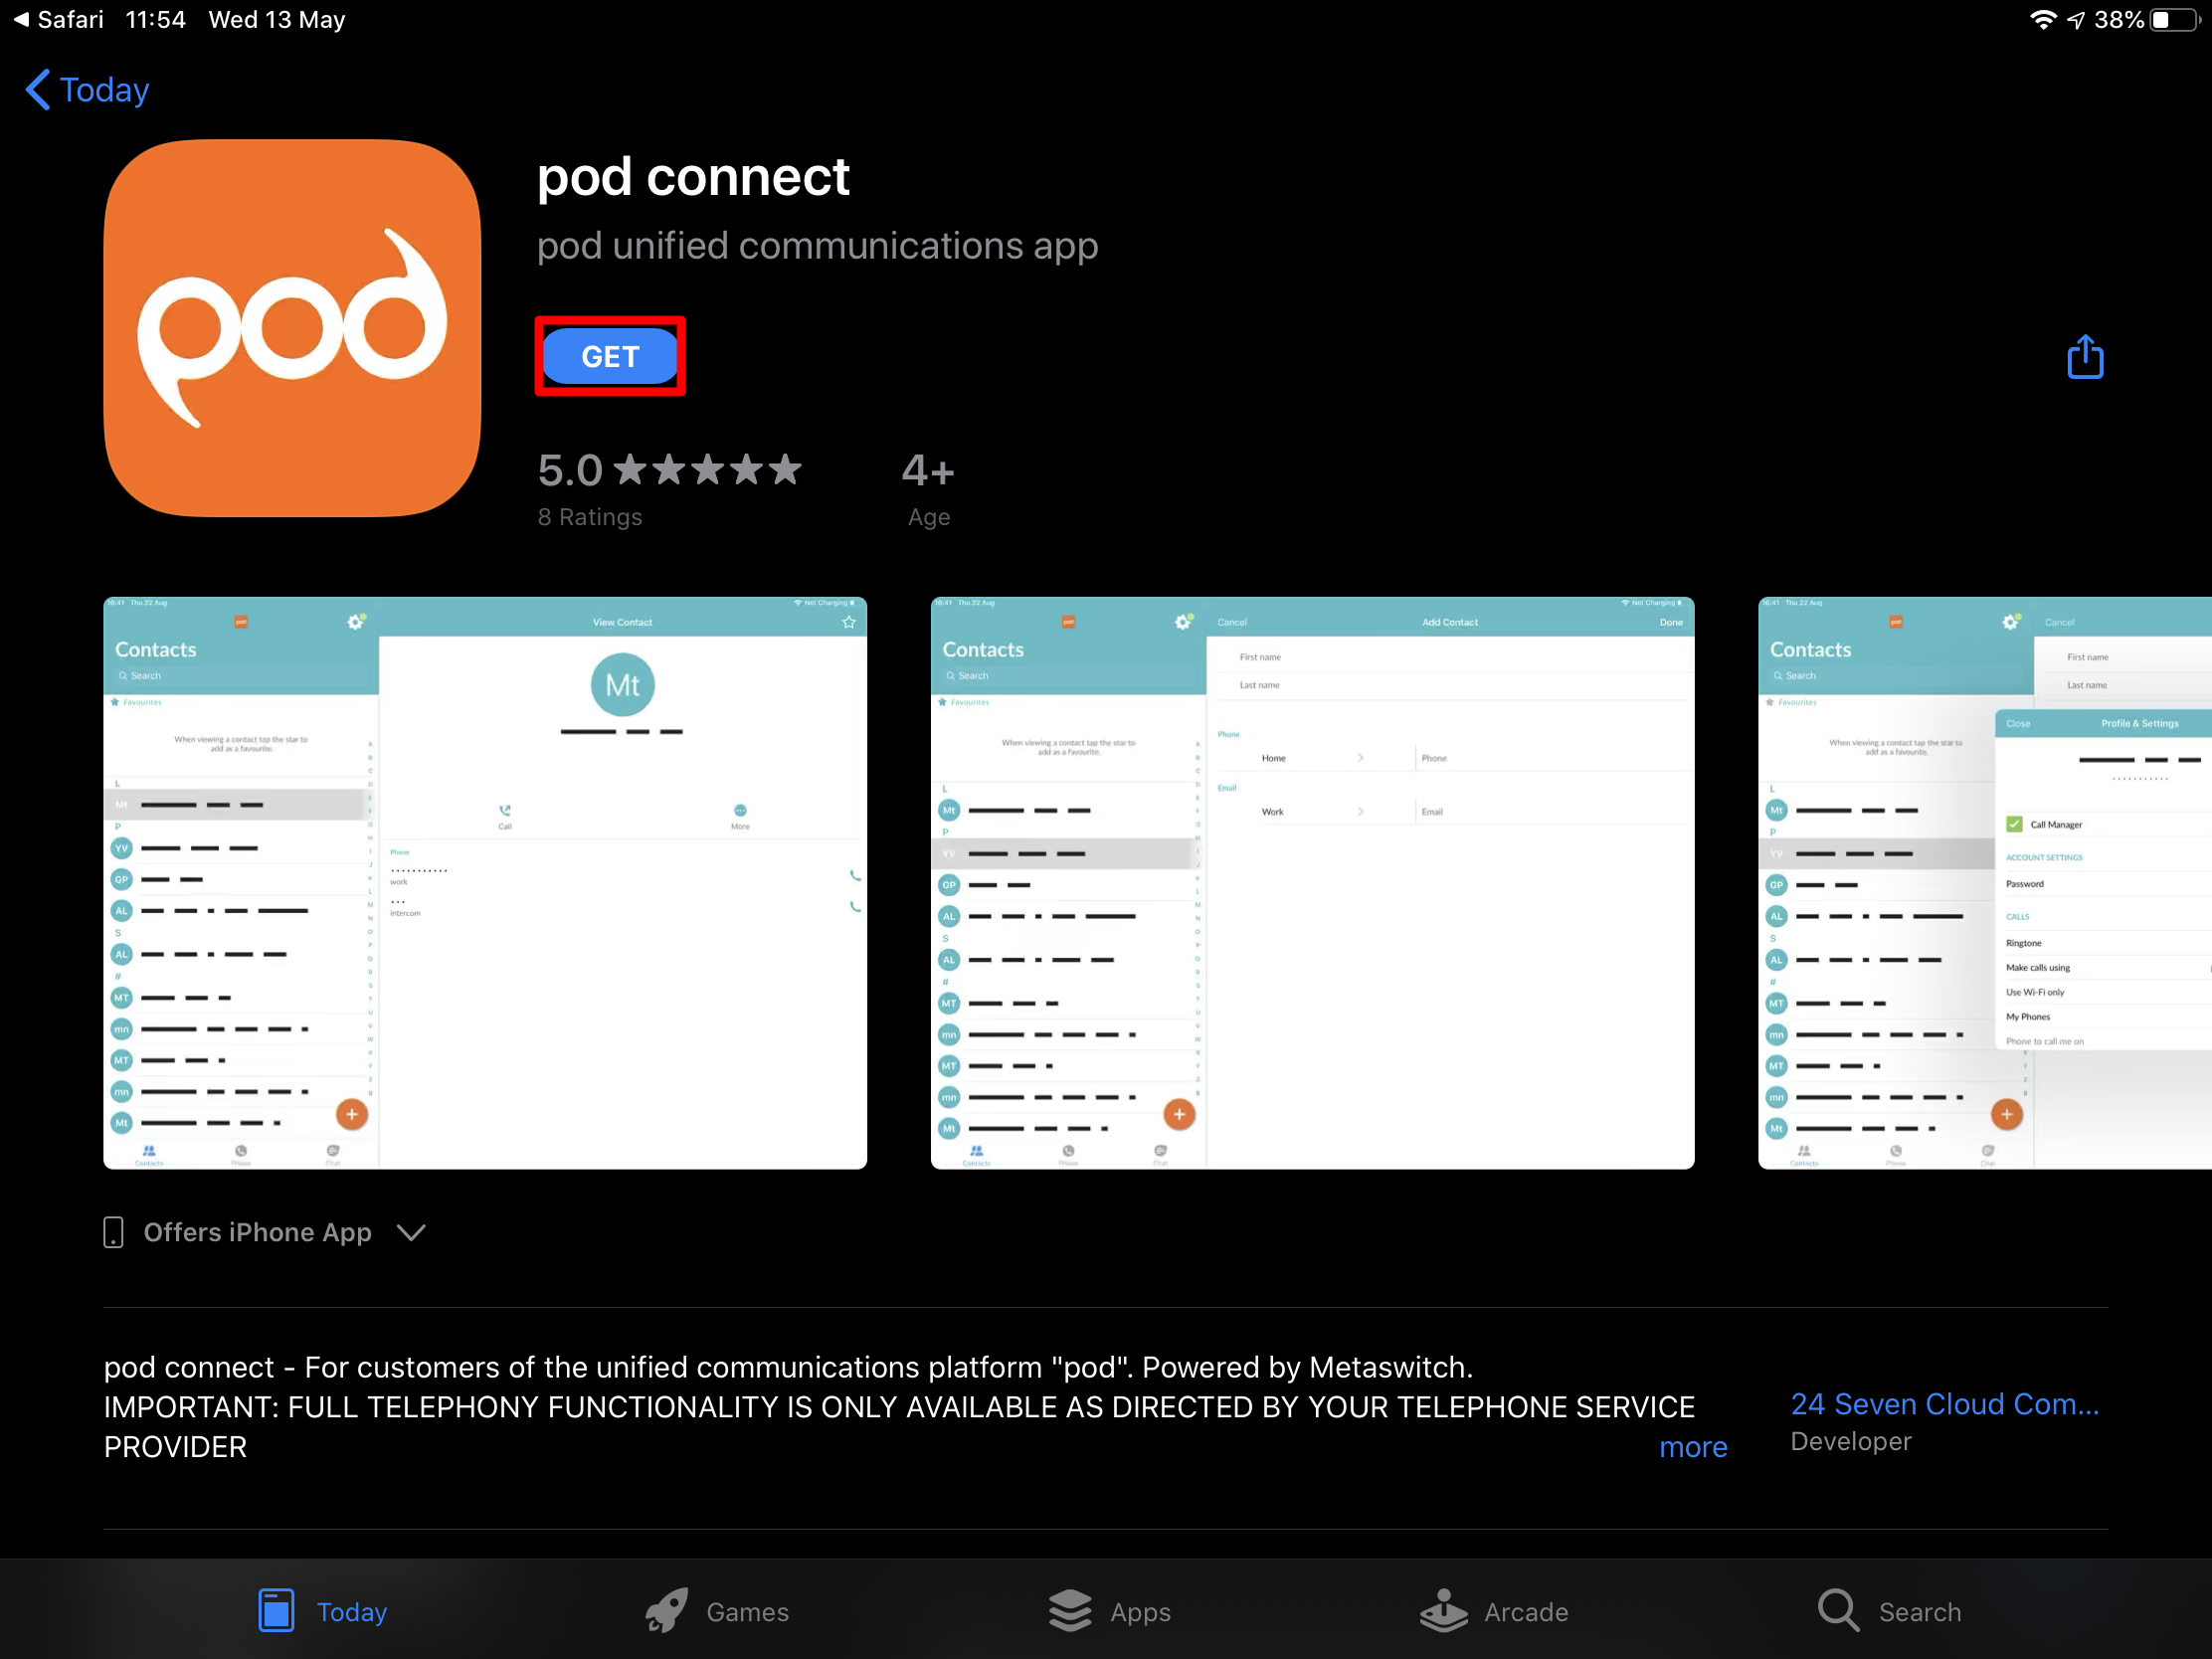
As pod connect is not installed tap on App store

This will take you directly to the App store to download pod connect tap on Get to download and install pod connect
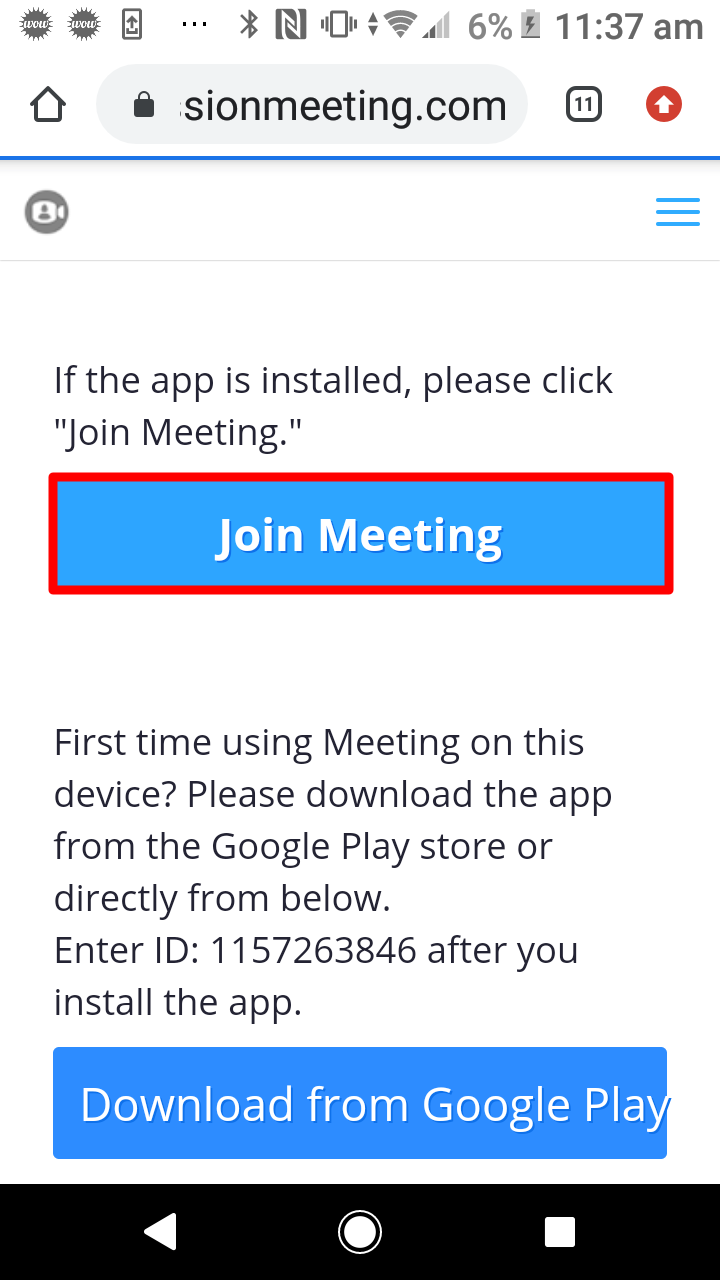
If are using an Android device when you receive the meeting invite and tap on the meeting url you will see the following page:
Tap on Download from Google Play
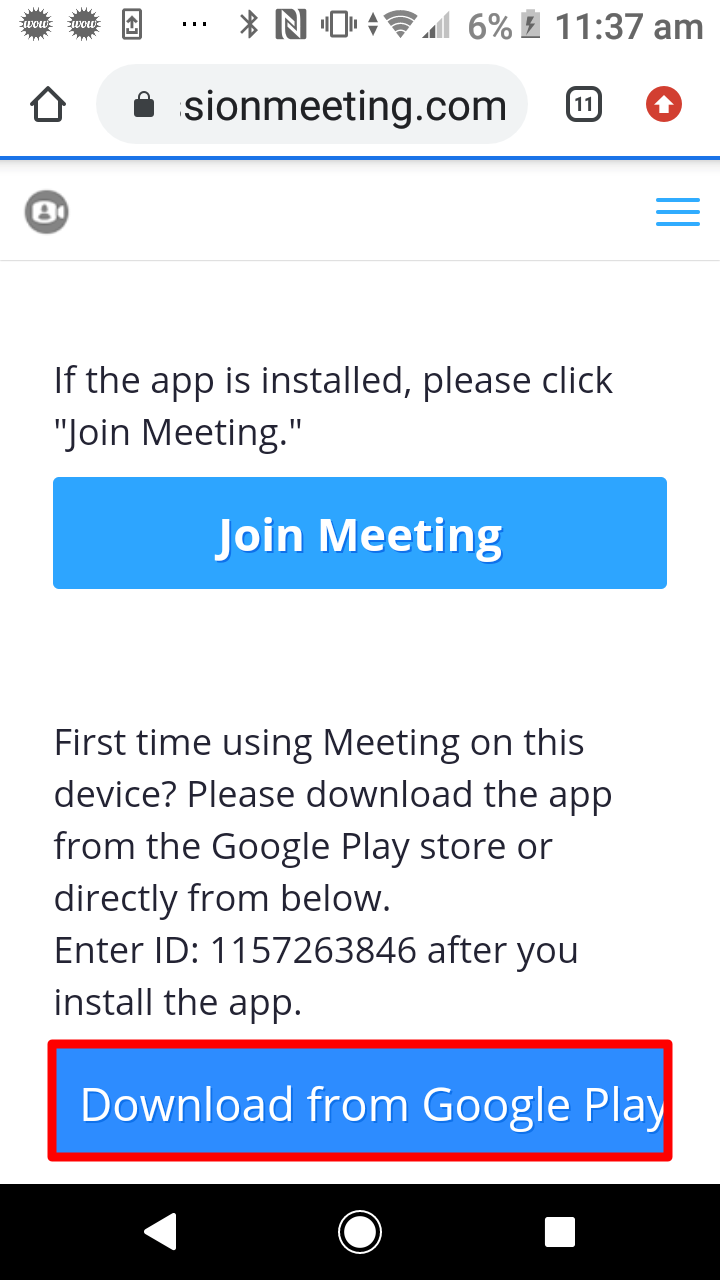
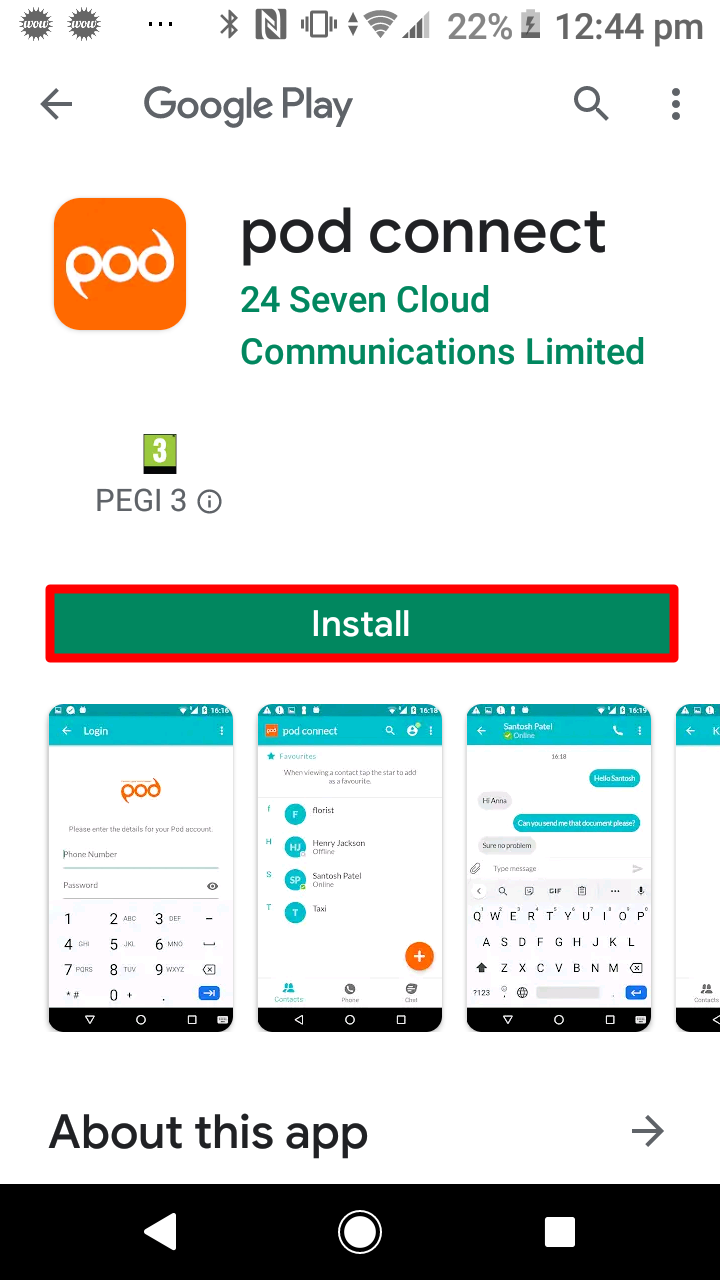
This will take you directly to the Play store to download pod connect tap on Install to download and install pod connect
How Do I Create A Personal Meeting Link (URL)?
| INFO: If you do not have the Meeting options, please contact your Service Provider to have this enabled. |
With a Personal Meeting Link you can instantly create meetings from any web browser. Your link will look like the following:
https://pod.accessionmeeting.com/my/yourname
yourname is also the meeting ID. This not only makes it easier to join meetings but also looks more professional. Users with Pod Connect already installed can just enter yourname in the meeting ID and click on Join Meeting.
Before you can create a Personal Meeting Link you must first install the Pod Connect for Desktop application, please see this documentation on how to download the application.
Once Pod Connect for Desktop is installed and logged in
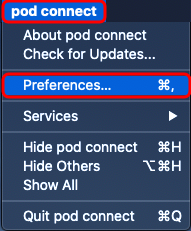
From Mac OS click on pod connect > Preferences...
From Windows click on Tools > Options
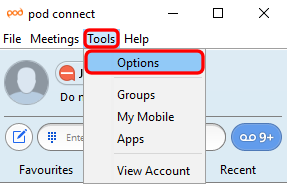
From the Preferences/Options window click on the Meetings tab at the top and then Advanced Settings at the bottom of the window.
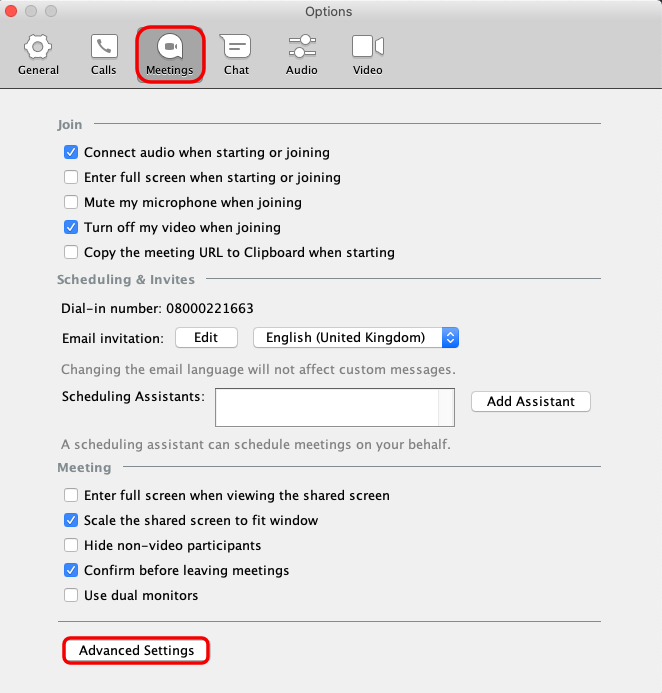
This will open a new window in your web browser. Click on In Meeting (Advanced) then scroll down to the bottom of the page.
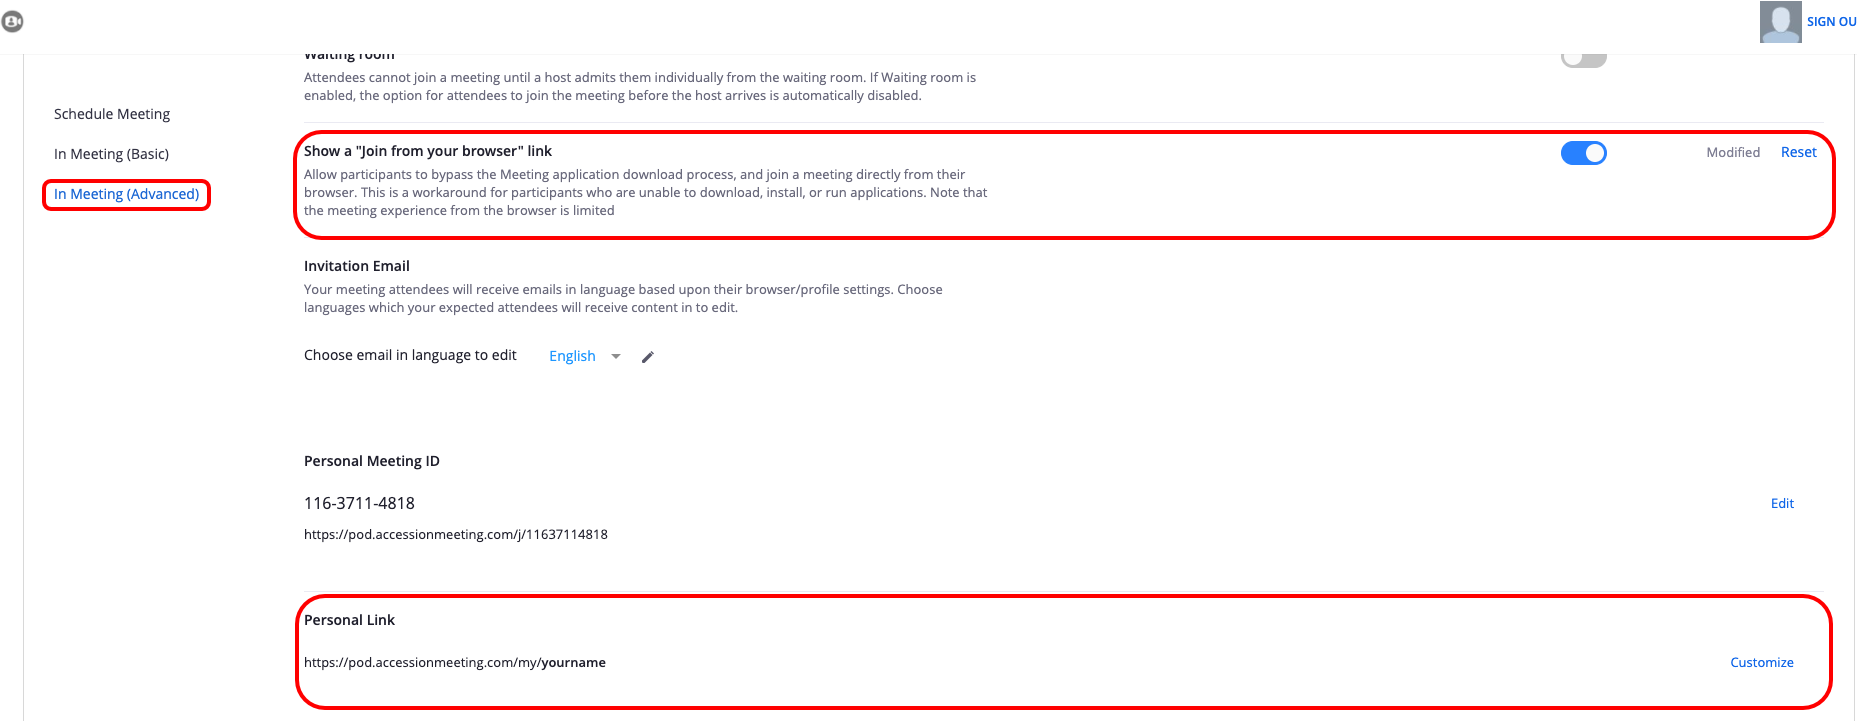
| TIP: While in the Advanced Settings we do recommend that you enable Show a "join from your browser" link as this will enable users that are using a PC/MAC without the Pod Connect for Desktop application installed to use the meeting without the need to install the application. |
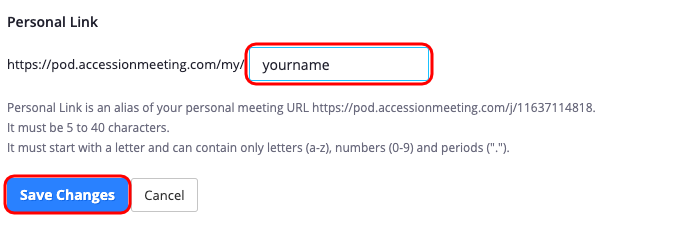
In the Personal Link section click on Customize then enter a name for your Meeting ID then click Save Changes
- It must be 5 to 40 characters.
- It must start with a letter and can contain only letters (a-z), numbers (0-9) and periods (".").
If the name you are wanting to use is already taken, you will receive an error when trying to save the changes.
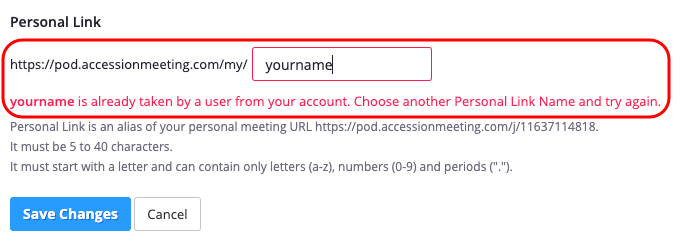
Please try a different name and click on Save Changes. When your changes have been saved the Personal Meeting Link will be ready to use.
How Do I Recorded A Meeting?
| INFO: Recording of meetings is only supported on the Pod Connect for Desktop. If you do not have the Meeting options, please contact your Service Provider to have this enabled. |
By default all Recordings will be saved on the following locations:
- Mac OS: /Users/Your-User-Name/pod connect
- Windows: C:\Users\Your-User-Name\pod connect
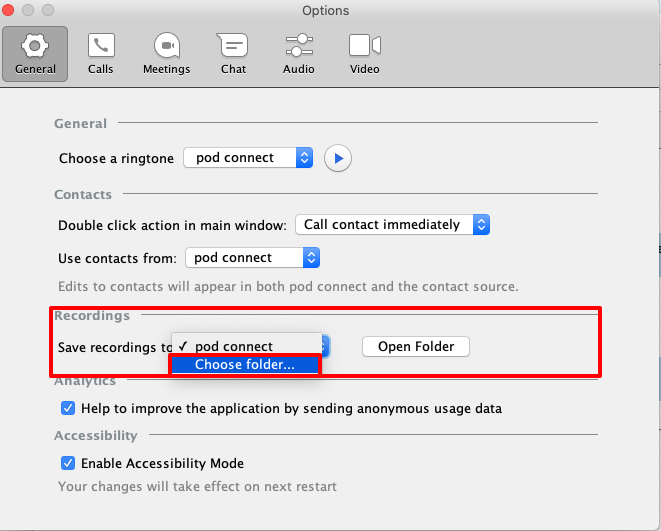
You can change this location from the Options panel
From Mac OS click on pod connect > Preferences...
From Windows click on Tools > Options
Under Recordings click on the drop down menu and click Choose folder... Browse to the folder you wish to use for Recordings and click on Choose
| INFO: Saving automatically to a cloud storage provider is not supported at this time. However if you use any of the following iCloud Drive, Google Drive, Dropbox or similar that uses synchronisation of folders you can then select that folder. Note that this would still leave the a local copy on your computer in that folder. |
To record your meeting, once you are logged into the Meeting click on the Record button.

The meeting will now start recording. You will a on screen popup appear

From the Meeting screen you can either Pause or Stop the recording by using the Pause or Stop buttons.
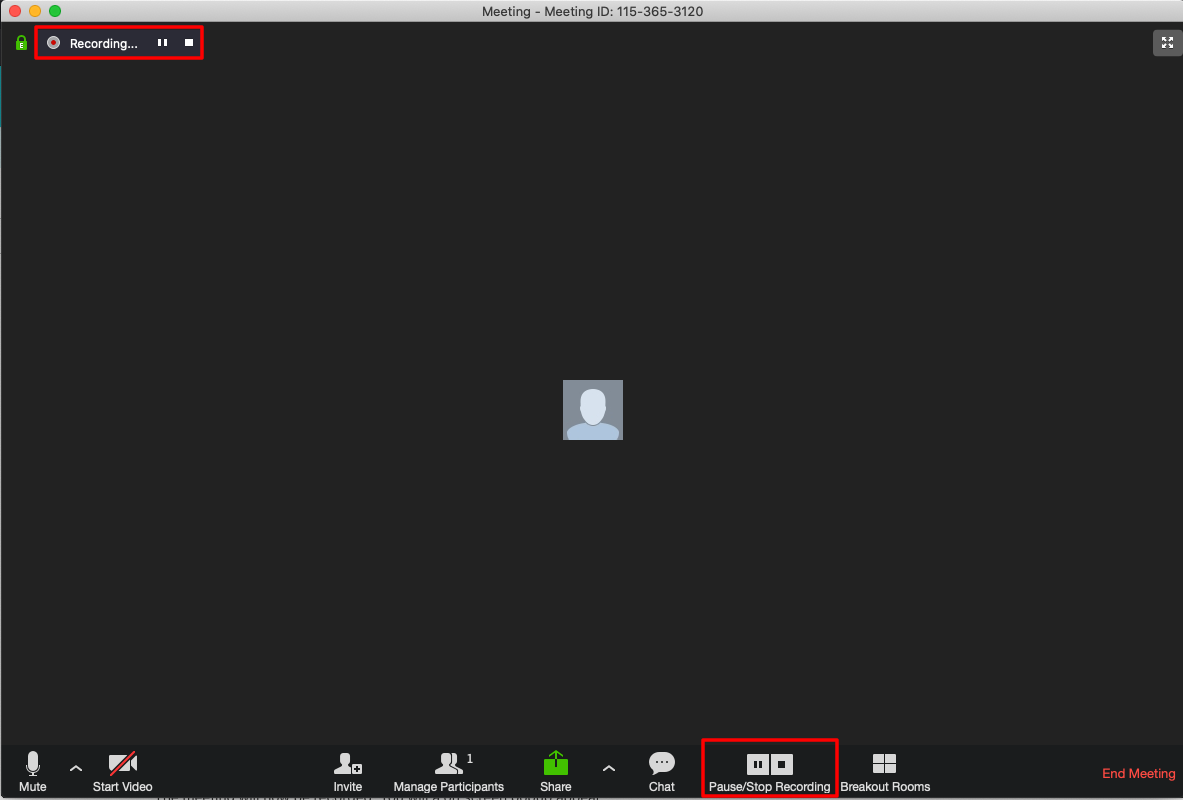
When the Meeting is paused you will see the following in the top left hand corner of the meeting screen

When you stop the recording the file will be converted into an mp4 file. This will be saved in the folder location you setup earlier. This will create a sub folder with the date, time and Meeting ID the mp4 file will include both video and audio, an audio only file will also be created in the folder.
| TIP: If you have issues playing the recording files, you could use an alternative player like VLC Player from https://www.videolan.org/ |