Standard Auto Attendant
Standard Auto Attendant offers a very simple automated telephone menu.
- Overview
- Planning your Standard Auto Attendant
- Logging on to a Standard Auto Attendant
- Configuring Standard Auto Attendant Menus and Schedules
- Configuring Your Standard Auto Attendant Extensions
- Activating a Standard Auto Attendant
Overview
Standard Auto Attendant offers a very simple automated telephone menu.
Callers to a business are directed to the automated TUI, providing key options to transfer to specific departments or individuals in the business, to transfer to a voicemail account directly, or to listen to a recorded announcement.
You can choose to either have a single menu that plays when your Standard Auto Attendant is turned on, or two different menus for business and non-business hours that are used according to a pre-defined schedule.
When the Standard Auto Attendant is turned off, you can either forward callers to another telephone number or play a message informing the caller that your business is currently closed.
Planning your Standard Auto Attendant
Before you start to set up your Standard Auto Attendant, it is a good idea to sketch out the operation of each menu on paper. This allows you to plan what options you need from the menu and how each one will operate.
For example, the main menu for a pizza company may need to include the following options:
-
- Play an announcement giving directions to the store, then return to the main menu so that the user can select another option.
- Place an order with a server.
- Speak to the manager.
- Speak to another employee using dial-by-name.
The diagram below shows how this menu would operate, including the key presses to access each option:

In the diagram, option 1 (directions to the store) is shown with an arrow returning to the main Welcome menu so that the caller can select another option if required. This is because this option is playing a recording. The other options do not allow the return to the menu.
For out-of-hours and holiday operation, Standard Auto Attendant may provide an announcement that the store is closed (without allowing the caller to select any options), or it may provide an alternative set of menu options.
Logging on to a Standard Auto Attendant
To configure your Standard Auto Attendant, you will first need to log into the Standard Auto Attendant, following these steps:
From the BG Administrator portal, select Lines and then click the Individual Line icon on the far right side of the page. As an alternative, you can access the CommPortal user login screen and enter the Standard Auto Attendant Number and Password.
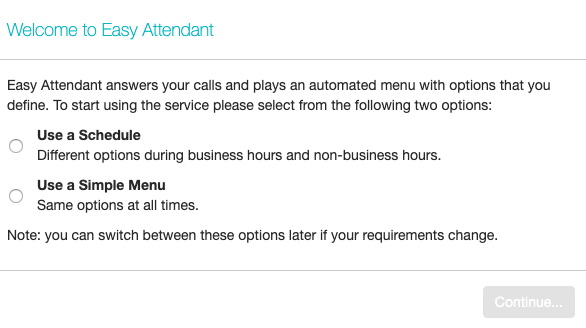
If this is the first time you have logged in, or if no Standard Auto Attendant configuration has yet been set up, you will see a Welcome screen.
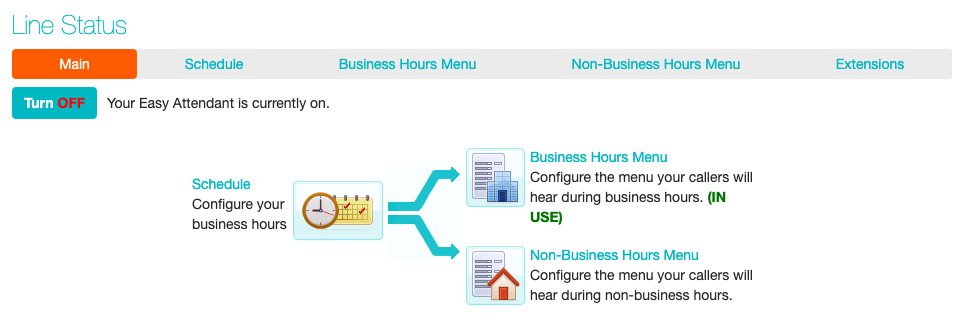
The screen then displays the Standard Auto Attendant
This screen enables you to:
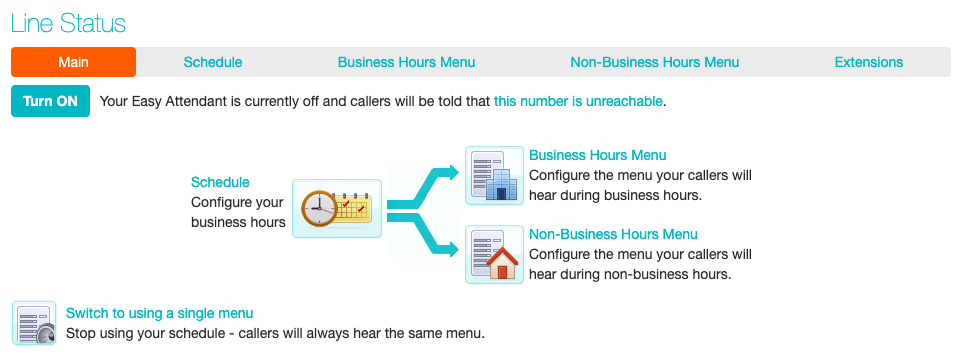
- turn your Standard Auto Attendant on and off (Standard Auto Attendant must be turned off while you are configuring it)
- configure your Standard Auto Attendant menus
- set the Schedule, if you are using different menus for business hours and non-business hours.
If you selected to use a single menu, this screen will have a single Standard Auto Attendant Menu tab.
Configuring Standard Auto Attendant Menus and Schedules
You should now begin configuring your Standard Auto Attendant menu(s) and schedules.
Select either the Business Hours Menu tab or, if you are using a single menu, the Standard Auto Attendant Menu tab.
First, set up your Standard Auto Attendant by recording the initial greeting.
If you are using the Dial By Extension option, you should ensure that this initial greeting includes the option for a caller to dial an extension immediately if they know the extension number of the person or department they want to reach.
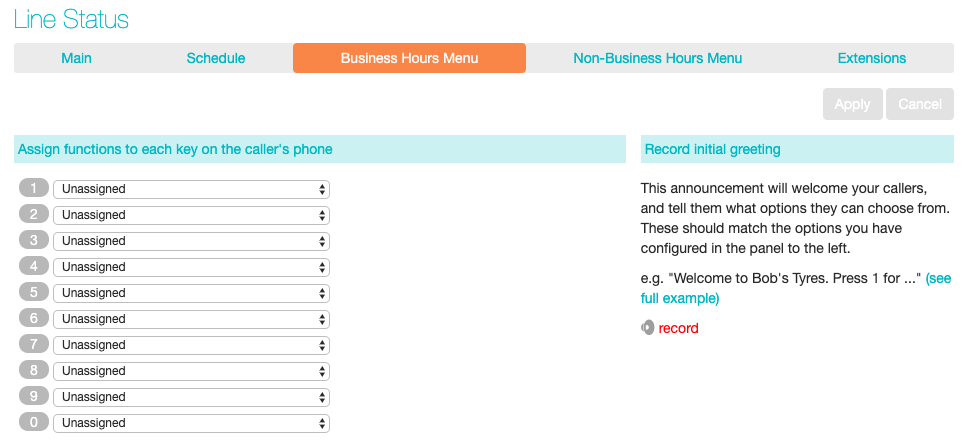
Select the record option on the lower right of the screen. This launches the announcement recorder, where you can either record an announcement, or upload a pre-recorded announcement.
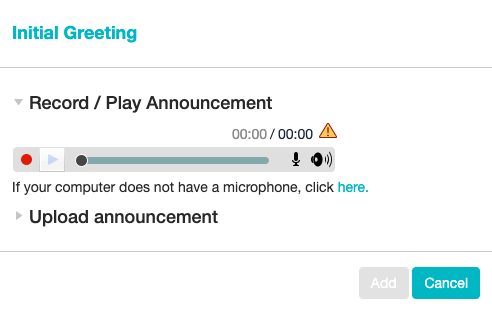
Once you have recorded or uploaded your initial greeting, you can return to the Menu tab.
Now you are ready to define the specific menu items as defined in your plan to one of the following options.
- Play Announcement
- Transfer to Phone
- Transfer to Voicemail
- Dial by Extension
- Dial by Name
If you are using a different menu for non-business hours, you should now set up the initial recording and configure the menu options on the Non-Business Hours Menu tab.
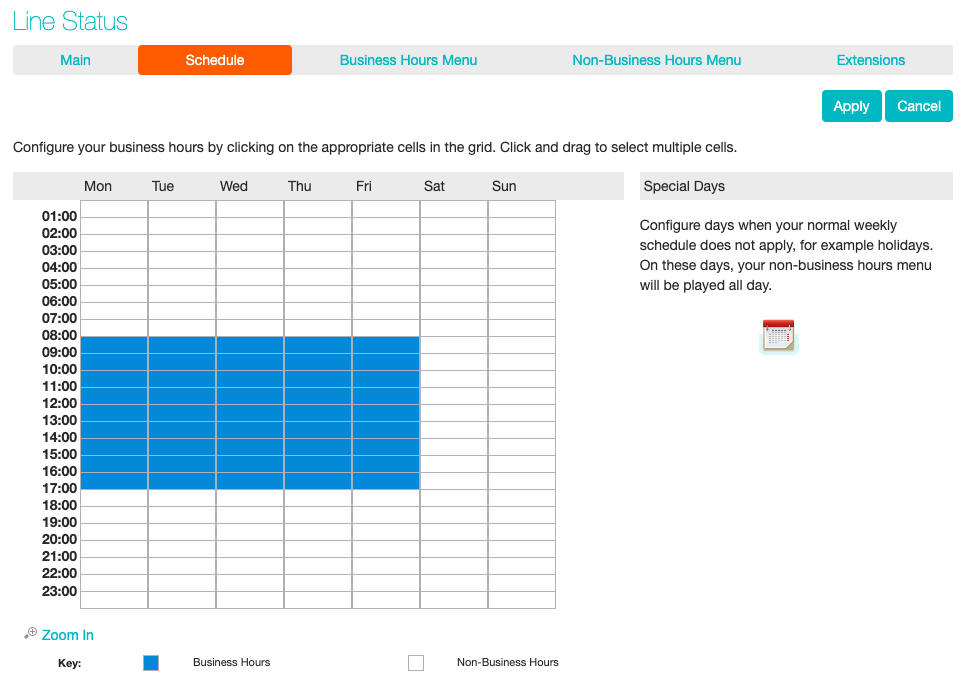
Next you will need to establish your working hours by selecting the Schedule Once in the Schedule screen, click on the Business Hours key and then click in the calendar and while holding down the left mouse button drag the mouse across the calendar to indicate the business hours. In the example below, the business hours are Monday – Friday from 9:00 am until 5:00 pm. Any other time are considered non-working hours.
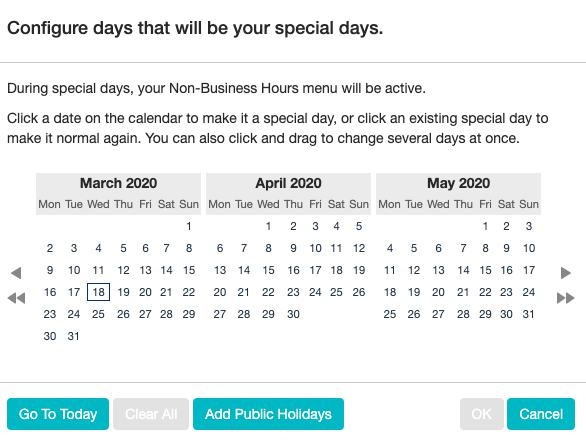
Next you will need to select any non-working days such as holidays by clicking on the calendar icon in the Special Days section of the Schedule page. You can choose individual non-working days by clicking on the date in the calendar, or you can use the Choose Public Holidays option to automatically add public holidays for your region.
Configuring Your Standard Auto Attendant Extensions
If you will be using "Dial by Name", then you will need to define which extensions will participate in dial by name and record the names of users in the extensions tab. Additionally, if you want to use the Dial By Extension option, you must configure it here.
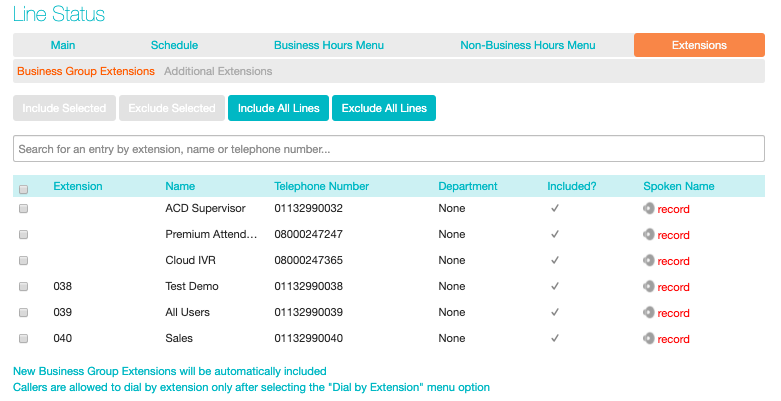
Clicking on the Callers are allowed to dial by extension only after selecting the "Dial by Extension" menu option link at the foot of the screen will give you the option to choose between At any time and Only after selecting the "Dial by Extension" menu option.
At any time: This means that callers can dial an extension at any point in the Standard Auto Attendant menu and not just on a Dial by Extension menu option. Selecting this will now change the link to Callers are allowed to dial by extension at any time.

If you want to restrict dial by extension to Dial by Extension menu options select. Only after selecting "Dial by Extension" menu option. and click Apply. It will now display that Callers are allowed to dial by extension only after selecting "Dial by Extension" menu option.
To include or exclude an extension from dial by name, select the extension(s) by ticking the checkbox on the left of each extension and then click either Include Selected or Exclude Selected.
To record the user's name click on the record link for the user. If a name has already been recorded, this link will display listen/change.
To record names to be used for dial by name, click the record icon. If the spoken name has already been created, the screen will show listen/change rather than record, and you can click this link to hear the existing recording and change it if you need to.
Use this recording interface to record the name or upload a spoken name recording, and click the Save
Activating a Standard Auto Attendant
The final step in this process is to activate your Standard Auto Attendant by clicking the Turn On button from the Main Tab. Your Standard Auto Attendant is now active.